– sponsored –
Gauged Porcelain Tiles/Panels
Gauged porcelain tiles/panels (GPTPs) have been trending for years with no end in sight. The key to installing GPTP successfully is the preparation before installation. Make sure the substrate is a clean, dry, bondable surface (never wood) and conforms with IRC/IBC standards, or with local building codes. To comply with ANSI A108.20 and ANSI A108.19 for GPTPs, the substrate surface must be nearly flat, with very little variation or lippage between adjacent panels.
The mortar choice and application is critical to the success of a GPTP installation. Choose a long open time, thixotropic mortar that provides excellent coverage, troweling ease and fast recovery time for no sag/no slump. TEC® TotalFlex® 150 or 110 Universal Polymer Modified Mortars have the characteristics needed for a successful GPTP installation – and 99% of other tile installations. For GPTPs, only use a slant notch or euro notch trowel that creates ridges designed to collapse on their own, minimizing air pocket formation. Every step of the prep for GPTP installation requires extra planning and precision to ensure success.
Penny Tiles
Penny tiles are a classic yet modern aesthetic. With non-slip properties, penny tiles can be ideal for wet or high-traffic areas. A common installation error is to line up each penny tile sheet on its straight side, creating a visible line between sheets once grouted. Avoid this error by 1) staggering the sheets as you place them on the sheets’ non-straight interlocking side and 2) checking that the “flower pattern” along the edge looks consistently spaced.
Use a small trowel to help limit the amount of mortar used, as excess comes up between tiles and is difficult to remove. Also, trowel mortar on a small section at a time, because it takes time properly positioning/repositioning penny sheets. Grouting penny tiles also is time-consuming. TEC® Power Grout is an excellent choice for wet or high-traffic areas where penny tiles are often installed. Its unique formulation is stain and mold/mildew resistant, and provides strong, color consistent joints free of efflorescence.
Picket Tiles
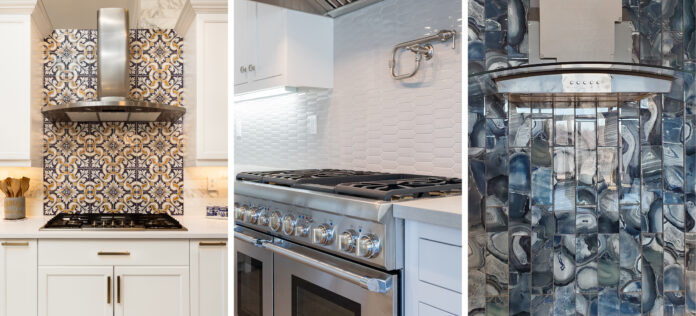
Another popular design trend is picket shaped tile. This shape lends itself to many different layout options from stacked, to subway, to vertical, to diagonal or even braided. For picket installations, take time to carefully plan the layout, which can be more complex than other shapes. Pickets often do not have matching bullnose pieces, so create a finished edge with coordinating chair-rail or pencil moldings or use an edge trim system.
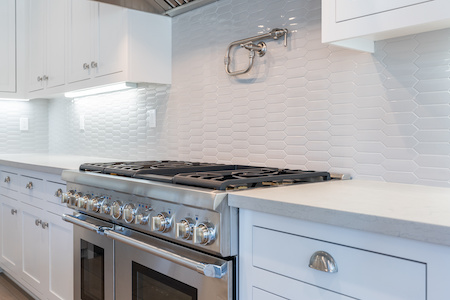
At transition points, such as the edges of a picket backsplash, use silicone caulk or sealant that matches the grout to finish the job. Where there is a change in plane or joint where movement occurs, flexibility is needed to prevent issues like tenting tiles, cracked tiles or cracked grout. Two options are TEC® Siliconized Caulk (sanded or unsanded) and TEC® 100% Silicone Sealant. Caulk or the sealant is the finishing touch to a quality tile installation.
Glass Tiles
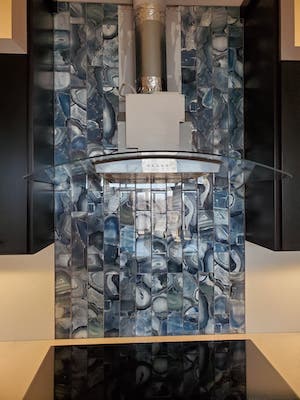

Glass tile is all-natural, resource-efficient and recyclable, but its translucent beauty is why it stays on-trend. Glass tile’s translucence makes choosing the right mortar imperative. White mortar allows for bright, more consistent tile appearance, since the mortar may be visible through the glass. To avoid visible trowel lines, flatten any ridges or back-butter the tile. Glass is impervious, making it difficult to bond. Consult the tile or setting materials manufacturer’s recommendations to pick the best mortar for the job.
Grouting finishes the glass tile aesthetic. Follow manufacturer guidelines, especially with sanded grouts, to prevent scratching the tiles.
Handmade Tiles
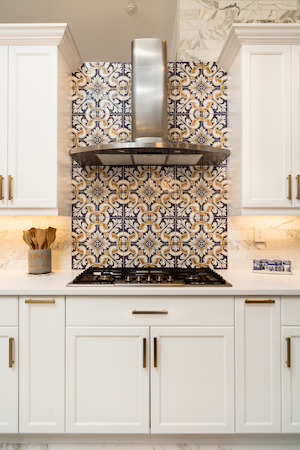

Handmade tiles are one of the oldest building materials. They continue to be used for both function and beauty. Whether in a residential backsplash or a stunning public mural, artisan-made tiles take longer to install than more uniform, machine-made tiles. Build extra time into the installation plan to accommodate the variations in color, uniformity, and size. Also, set expectations for these variations with the client.
Since handmade tiles are not perfectly flat, avoid mastic and employ a thinset mortar. To protect handmade tiles, seal before installation. It is wise to experiment with placing handcrafted tiles into the planned design before installing, as optimizing placement can help hide imperfections. Grouting handmade tiles can be a challenge. If the tiles’ design is dimensional – built up or recessed – taping over these areas before grouting greatly eases cleanup. Though handmade tiles require some extra effort, the resulting beauty of a one-of-a-kind installation is worth it.
Tile in Unexpected Places
The myriad design options and impact of tile have fueled its use in unusual places. A newer trend is tiling the ceiling in rooms, not just showers. Tile is also being installed on kitchen cabinetry, stair treads and risers, fireplace surrounds and even tabletops and the back or interior of bookshelves. It is not unusual for a mosaic tile installation to replace conventional wall art, as the focal point of a room. Designers can add dimension, texture, and color with stunning effects to just about anywhere with tile. Be sure not to limit the locations possible for your next tile installation.
While tile trends shift over time, the six popular trends above are here for the foreseeable future. Staying informed on the latest tips for tile installation, keeps designers and contractors creating the highest quality tile work and the happiest customers.
Article written by John Corley


