


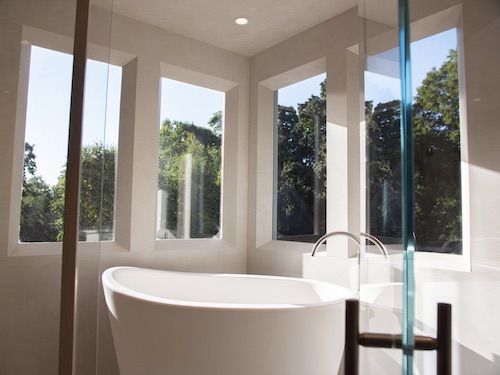
The client’s expectations were high – create an epic bathroom that feels like a spa. This renovation would require tremendous forethought and planning. We at NS Builders, a premier custom home builder in Eastern Massachusetts, faced numerous challenges – avoiding tile lippage, curbless entry, floor-to-ceiling glass walls, and windows in a steam room – but this is the stuff NS Builders thrives on.
The scope of work
Picture an oversized shower with a separate bathtub, giant slab tiles, one wall of floor-to-ceiling glass with a hinged glass door, four exterior windows inside the shower/tub area, steam, and curbless entry. Waterproofing the shower/steam area required flawless execution. And that is why we decided to partner with Schluter-Systems. They had everything we needed – an entire line of products that allowed us to achieve our goal.
So, let me walk you through the steps we took to make this bathroom not only functional, but beautiful.
Starting with the floor
After demo, we began flattening the entire floor of the bathroom – a critical step needed to avoid lippage. Lippage occurs when one tile edge is lower or higher than an adjacent tile. Serious injury can occur if someone trips on a high tile. And it looks terrible. The solution: start with a completely flat substrate.
Our team achieved this by sistering every single floor joist to ensure the whole space was flat. The shower would be curbless, so we had to set ourselves up to successfully recess the entire subfloor within the shower space while ensuring that it was both flat and structurally sound.
Waterproofing the walls
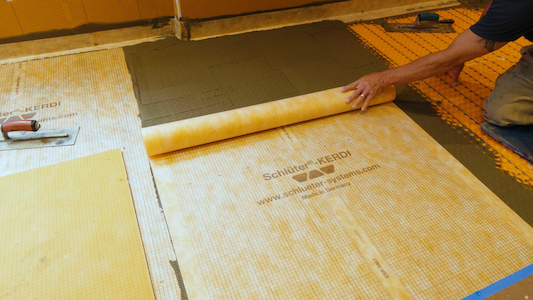
Schluter-KERDI-BOARD, a multifunctional tile substrate and building panel that is completely waterproof and easy to cut, was installed on all the walls. In addition to securing the panels with screws and washers, we applied a sealing and bonding compound to the backside of the panels, which is a bit of overkill and not required, but we wanted to add another layer of holding power to the framing for peace of mind.
Once the panels were installed, it was time to seal up the seams, the corners, and all screw heads. We applied strips of waterproofing membrane to seal abutting joints of membranes and building panels. This step provides a fully watertight seal to prevent leaks and mold growth. Because we would later be installing monolithic tile panels we meticulously squeezed all excess thinset from underneath the membrane to ensure the surface was truly flat – no waviness or bubbling under what would be our tile substrate.
Floor warming
The next step was to install the DITRA-HEAT floor warming membrane. It does two things very well. First, it provides uncoupling between the tile and subfloor. That means the subfloor can slightly move or contract without cracking the tile or grout joints. Second, the stud structures act as a track for us to lay down the heating cables. No feet will touch any cold tile in this bathroom.
For that added touch of spa-like luxury, we extended the heating cable right into the shower. The floor warming membrane is waterproof, but once we added a cable to it, especially in a wet area like the shower, we needed to waterproof it again to prevent that cable from being exposed to moisture. Adding an additional layer of waterproofing membrane over the entire shower and bathroom floor creates a cohesive waterproof layer so we won’t have any shocking moments in the shower.
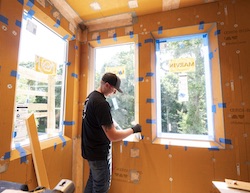
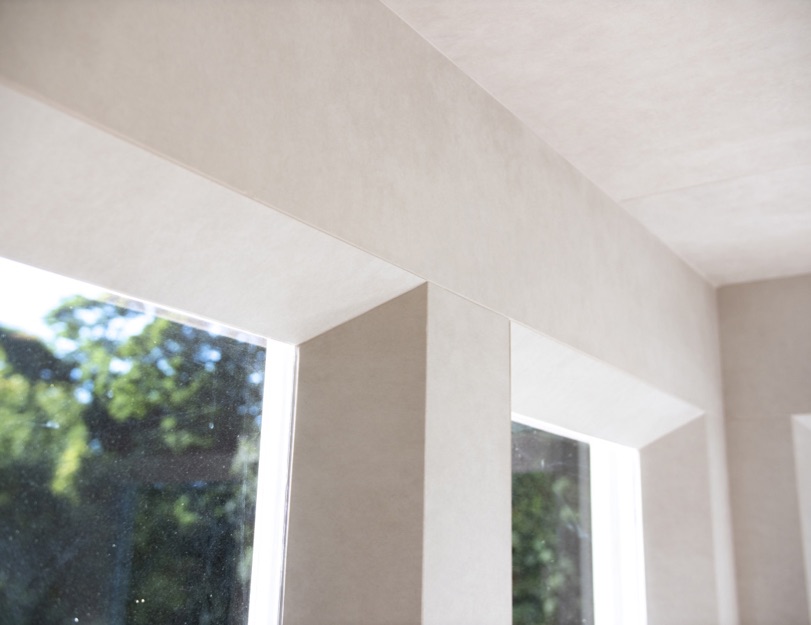
Waterproofing the windows
One of the biggest challenges involved waterproofing the four windows inside the steam shower. Cambridge Seven Architects came up with the perfect solution – taper the tile into the glazing with no window frame exposed from the inside.
To achieve this, we needed to continue with our waterproofing detail from the wall panels onto the window glazing. We used KERDI-FIX adhesive, which bonds well to glass, resulting in a sealed system. So, if ever any water or steam ran down the window, hit the tile, and got behind the tile, it would dead end at the waterproofing layer.
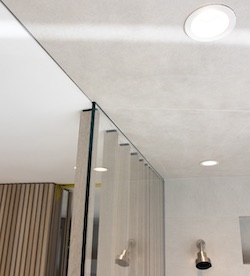
Walls of glass
The glass walls were templated and installed before we did any tile work. Our goal was to create the illusion of the glass being buried into the finished surfaces without visible support.
This type of installation created a lot of weight, which in turn required sound structural support. So we set the glass on three sides – ceiling, walls, and floor – and used a strong structural silicone that could support the wall panels and swing of the door.
We used the Schluter-DECO-SG glass track or support channel for the walls. This track has an anchoring leg that gets embedded in thin-set mortar – adhering it to the waterproof panels. Another layer of waterproofing membrane was applied over that flange to provide waterproofing behind and on top of the glass track.
A stress-inducing tub
The tub decided early on not to cooperate. It wouldn’t fit through the windows or the door to the shower. It had to be moved into place before installing the glass, waterproofing, and tiling. So now imagine the added stress of working around that very expensive, freestanding tub.
Time to tile
Because we were working with large tiles, we approached the tile work similarly to a countertop install—templating wall by wall, piece by piece, cutting it on the CNC back at the fabricator’s shop, and then bringing it to the site for installation. It was a slow process as everything had to be templated, but this was an integral part of the project that led to its stellar outcome.
These large panels were installed using Schluter ALL-SET – a specialized modified thin-set mortar. We were able to use the same thinset to install all of the membranes and the tiles for this project, so we had no need to switch to different thinset for different stages of work.
The end result
To say this project was complex would be an understatement; but that’s what made us so eager to do it! And when you combine talented craftsmen and high-quality products, then whatever the client dreams of and the architect designs, we can make it happen.

Nick Schiffer
Nick Schiffer is the Owner & CEO of NS Builders, Host of Site Visit & Crafted on YouTube & Co-Host of The Modern Craftsman Podcast. NS Builders is a full-service construction company and general contractor, founded in 2014 by Nick Schiffer, a lifelong carpenter with a background in both residential construction as well as high-rise construction. Based in Boston, MA they primarily work in privately owned homes and condos located in Boston and the surrounding area. Focusing on the high-end residential market with a creative approach that focuses heavily on providing quality craftsmanship as well as value for their clients.


