Before beginning an estimate, it is imperative that you have the knowledge of how to read and understand the drawings and specifications that make up a set of building plans. The smallest mistake can lead to a potential loss of many thousands of dollars. If large enough, it could put your business in serious financial distress. However, please don’t be discouraged; you have to start somewhere. Just be very cautious. These tips will give you a good foundation of the bidding process, and provide you guidance on how tile contractors bid.
1 Invitation to bid – A general contractor will primarily send an invitation to bid via email or sometimes a site visit, depending on the project scope. The email will contain a basic description of the job and a link to download the building plans and specifications. Depending on the project and general contractor (GC), there may be a pre-bid meeting to address any questions and also a site walk-through to evaluate the existing conditions.
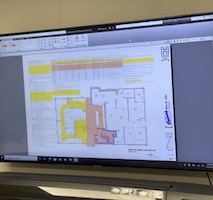

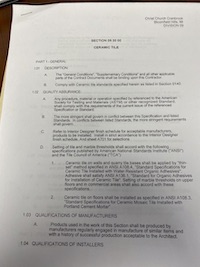
2 Downloading plans – Most plans are usually PDF files. You can download Adobe Acrobat Reader for free for your laptop or tablet, which will allow you to view the document. Some files will come in dwf format which can be viewed by Autodesk Design Review, another free download. There can be many versions of the plans by the time it comes to the final bid date.
Be sure to always download the latest edition of the plans and specs, as well as any addenda. This is your opportunity to assess the job and determine if it’s a right fit for your company. Evaluate the risk and ability to complete the project. If it is beyond your company’s ability to execute, kindly decline the offer to bid. It is professional practice to inform the GC of your bidding intentions, either way. The next project may be a perfect fit for you.
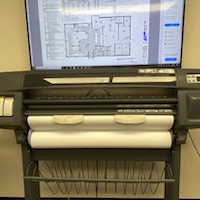

3 Printing plans – Some people prefer to do their material takeoff solely on the computer, and some prefer a hard copy, or both. A physical set of plans can be costly, but are beneficial to have. Some like to use a hybrid of the two. It is recommended to print all pages relative to the scope of work, but be cautious not to overlook any details on others.
4 Reviewing plans – In your subcontract, it will state that all contract documents (plans and specs) are a part of your contract. That being said, you must review every single word and detail of every single page of the building plans. This means all architectural, structural, civil, mechanical, electrical, plumbing, etc. There could be a detail that shows waterproofing in the plumbing plans, and if you miss it, you are still responsible. Review all pages cautiously.
The plans will also say “do not scale plans.” This is okay if all the dimensions are included on the drawings. This is not always the case. Some estimators will use their architect’s scale and compute all of the square and linear footage. It is advisable to first check the scaling. Simply measure multiple given dimensions all around the page and make sure your dimension and the written dimension are the same. Be absolutely certain. If all is well, begin the material takeoff.
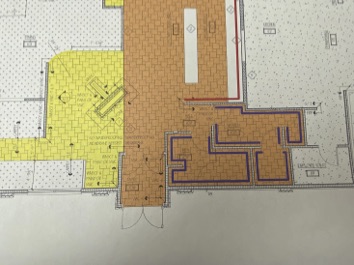

5 Markup – Organization is the key to professional bidding. Many tile contractors begin with the finish floor plan. It’s a good idea to have an array of highlighter colors. Go through and highlight each tile selection with its own color. The same process will be used on the elevation pages with the wall tile. After highlighting, compute the square footage of all the different tile and the linear footages of base, as well as any other tile trim, metal trim, waterproofing, crack isolation, and whatever else pertaining to the scope of work.
Please double and triple check your work. Mistakes can be lethal to your business. You will usually find something that is unclear in the plans. This is when you would submit an RFI (request for information). This is done by sending your questions to the GC. They will then send this off to the architect or owner. It is not a good idea to contact the architect or owner directly. The GC frowns upon this, and you will not make any friends doing so.


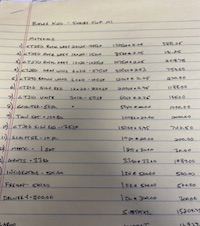

6 Obtaining material costs – Once your markup is done, you will need your pricing. Depending on the project, there may be national account pricing set up with the distributors. Make sure that these prices are current. It is possible for somebody to make a mistake and send you expired pricing. Always check if there are any additional costs such as freight, and be sure to get a lead time on all the materials.
7 Value engineering – Some general contractors ask for value engineering. This is when alternatives to the materials and/or scope of work are submitted to reduce the overall cost of your scope.
8 Prevailing wages – On government-funded projects you may see a requirement called the Davis-Bacon Act. This applies to contractors and subcontractors performing work on federally-funded or assisted contracts in excess of $2,000.00. Under this act, contractors and subcontractors must pay their laborers and mechanics employed under the contract no less than the locally- prevailing wages and fringe benefits for corresponding work on other projects in the area. Check the U.S. Department of Labor website for information relating to your area.
9 Total cost of job – At this time, you should compute your total cost of materials and labor. For the material cost, it’s as simple as quantities multiplied by price, then add your sales tax, freight charges, and any other surcharges that may apply. Some distributors add as much as 5% surcharge to your overall amount. Some add none. Only you can decide what you want to charge for your labor amounts. Once you have these two amounts, you have your grand total of job cost. Most people will add a percentage of 5-20% on top of overall cost for profit and overhead. Again, please double and triple check your math. Write neatly so you can read your writing. For your final bid number, it’s recommended to have a number that looks neat. For example, let’s say $15,875.00. Keep the numbers rounded to the nearest $25, and never have a cent amount.

10 Proposal – It is important to have a professional, neatly organized proposal. Have a company letterhead with all of your company information on it. State the job name, address, date, GC you are sending it to, the GC’s estimator and/or project manager’s name, and the scope of work you are bidding. This body of information should be the beginning of the proposal. Put in a blank space or two where the second body of information should be. This is where you would list things such as the date on the plans and specs used to bid as well as any addenda, and any exclusions or stipulations that need to be known. Some like to state that the GC must provide adequate lighting, electricity, heat, and water. Some GCs want you to list out exactly what your proposal includes. These exclusions are case-sensitive and may vary greatly from job to job. Being a firm believer in correct installations, we bid to the given specifications. Many, however, do not. These people tend to be the low bidder and others the high bidder. Make it known in the proposal that you bid to spec and to keep this in mind when comparing to other bids. It is also a good idea to state how long your proposal is valid for. Many contractors like to say 30 days. Stay in good contact with the GC after bid submission. Always ask where your bid sits with the other bids they have. It’s good to know where you stand.


