Working with encaustic, pressed cement, and concrete tile
Last month we reviewed the origins, history, manufacturing processes, and characteristics of encaustic, pressed cement, and concrete tile. This month we will dig into the proper installation techniques as well as the precautions necessary for each one.
For many years, statements have circulated in the industry that tile is tile, and all tile is installed the same way – the only difference is its color or texture. These statements are far from the truth and can get the unsuspecting installer into serious and expensive difficulties.
Substrate prep
To begin any tile installation, be certain that the structure will support the tile assembly and that the substrate is acceptable. The list of substrate must-haves includes a clean, non-contaminated surface that absorbs water or is designed to produce a bondable surface and is flat. The subfloor surface flatness requirements of ANSI A108.02 state; for tile with all edges shorter than 15″ (0.38 m) the maximum allowable variation is 1/4″ in 10′ (6 mm in 3 m) and for tile with at least one edge 15″ (0.38 m) or longer, the maximum allowable variation is no more than 1/8″ in 10′ (3 mm in 3 m). Bringing the substrate into these tolerances can be accomplished using an appropriate patch, a flowable hydraulic cement underlayment (FHCU) [formerly known as SLU] and a primer produced by the same manufacturer, or dust-controlled grinding meeting OSHA guidelines.
Tile selection and installation standards
The selection of the tile setting and grouting materials is crucial to success. Using an old favorite may work in some applications, but the tiles being discussed here may have very specific requirements. Thoroughly review the tile manufacturer’s written recommendations as to mortar type, color, trowel suggestions, the type and color of the grout, and ANSI designations. And as always, trowel the mortar in straight lines, moving the tile in a perpendicular direction to effectively collapse the ridges into the valleys as seen in the NTCA Trowel and Error video.


ANSI A108.5 Setting of Ceramic Tile with Dry-Set, Modified Dry-Set, Exterior Glue Plywood (EGP), or Improved Modified Dry-Set Cement Mortars provides excellent guidance for the installation of tile that meets ANSI A137.1 Specifications for Ceramic Tile. Although the tiles mentioned in this article do not meet the A137.1 requirements, the installation procedures offer great techniques including the following A108.5 sections.
- 2.1.4 Wipe tiles if dust is present from manufacturing or shipping.
- 2.1.5 Unless otherwise specified by the tile manufacturer, do not soak tile prior to installation.
- 2.2.1 Clean surface thoroughly. Dampen cementitious substrates if very dry, but do not saturate.
- 2.2.3 Contact area shall not be less than 80%. Contact area on all exterior installations or interior wet installations shall not be less than 95%.
- ANSI A108.10 Installation of Grout in Tilework explains the how-to of standard cement grouts (A118.6) and polymer modified tile grout (A118.7) installation.
- 5.3.2 Dampen dry joints prior to grouting. Do not leave puddles of water in the joints before grouting.
- 5.3.3 Keep an adequate joint depth open for grouting. Force a maximum amount of grout into the joints.
- 5.3.4 All grout joints shall be uniformly finished. Cushion edge tile shall be finished evenly to the depth of the cushion.
It must be noted here that although these recommendations are the industry standard, the grout manufacturer’s instructions always override the standard.
Installing encaustic tile


Encaustic tile, which can be glazed or unglazed, installs similarly to conventional ceramic or porcelain tiles by using the recommended dry-set cement mortar. During the installation process, maintain a clean tile surface using a slightly damp sponge.
When grouting a glazed encaustic tile, follow the above standard and the guidelines of the grout manufacturer. However, if the tile exhibits crazing (cracking that occurs in fired glazes or other ceramic coatings due to critical tensile stresses [ASTM C242]), always test by grouting a sample piece before grouting the installation. Also, exercise caution when using a contrasting grout color to the color of the glazed tile.
For unglazed encaustic tile, always test first as would be done with an unglazed porcelain, quarry, or mosaic tile. If staining is evident, use a good quality grout release or penetrating sealer.
Installing hydraulically-pressed cement tile (HPCT)
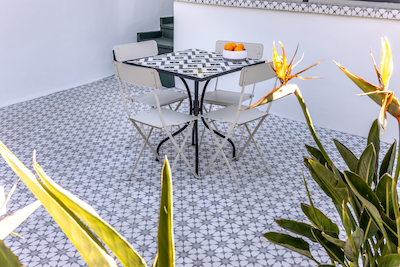

HPCT is made by hand. Since it does not meet A137.1 standards, it can vary in size and thickness. When deciding on or verifying the specified grout joint size, the use of a mockup is a good decision. The mockup can be either fully set and grouted, or it can be a dry lay of the tiles on a flat surface to determine the optimum joint size. Always have the decision-maker sign and date a document approving the joint size and overall appearance.
Since HPCT is not glazed or fired in a kiln and is very absorptive, the tile surface must be kept meticulously clean. Most manufacturers strongly recommend cleaning and sealing the tile before installing. Prior to this process, it may be wise to wear protective gloves to keep body oil from the installer’s hands from staining the tile.


The porosity of HPCT can be a challenge since it is not fired in a kiln. Some of these tiles can leave the factory and ship with high moisture content. Before applying sealer, check the tile with a moisture meter to determine if it is within the requirements of the sealer manufacturer. If beyond this requirement, carefully stand the tiles on edge and allow them to dry to an acceptable moisture level.
The tile should be pre-sealed with one or more coats per the tile manufacturer’s recommendations. After installation, the tile should be thoroughly cleaned and tested by placing a drop of water on the surface. If the water beads up, it is ready for grout. If not, apply another coat of sealer.
Considering all the choices available for grout, verify with the tile manufacturer that the selected grout is recommended. Additionally, many manufacturers caution against using dark colored grout or a grout that contrasts the color of the tile. During grout application, be sure to keep the surface clean and do not let excess grout dry on the face of the tile. When the grout is completely dry, an additional coat of sealer should be applied.
For further information, consult the NTCA Reference Manual section on Pressed Cement Tile.


Installing concrete tile
Concrete tile is porous and should be protected with the tile manufacturer’s approved sealer prior to installation and especially prior to grouting. Some manufacturers offer the option of pre-sealing the tile at the factory, which can be a time saver.


Concrete tile is installed similarly to ceramic tile by following the ANSI A108.5 standard and the tile manufacturer’s guidelines. Consult the tile manufacturer for the recommended type of grout. Apply the grout with a good quality float, getting all excess grout from the tile face. When appropriate, use a damp sponge to clean the surface to avoid staining. On textured tiles, it may be helpful to use a grout bag rather than a float. Allow the grout to cure for 72 hours, and apply one or two coats of the recommended sealer. After curing, a drop of water should bead up indicating adequate sealer is present.
Conclusion
No matter which tile is selected, be aware that the manufacturer may list cautions and/or recommendations on the box or the product data sheets. Many manufacturers list a disclaimer on the box stating, “Installation constitutes acceptance.” Do not install the tile if there is a visible defect, sizing issue, or color blending problem. Always contact the manufacturer and obtain written instructions before beginning installation.


Scott Carothers
Scott Carothers is the Acdemic Director for the Ceramic Tile Education Foundation (CTEF) and is responsible for the creation of the Certified Tile Installer (CTI) program, and is involved in the creation of the Advanced Certifications for Tile Installers (ACT) program as well as providing training to others in the tile industry.
Carothers has been involved in the ceramic tile industry for nearly 40 years and was the owner of a successful retail and installation firm prior to CTEF. He has served as President and Chairman of the Board of the National Tile Contractors Association (NTCA), Chairman of the NTCA Technical Committee, was named the NTCA Tile Person of the Year in 2005, and the NTCA Ring of Honor recipient in 2013. He is a voting member of the ANSI and the TCNA Handbook committees.


