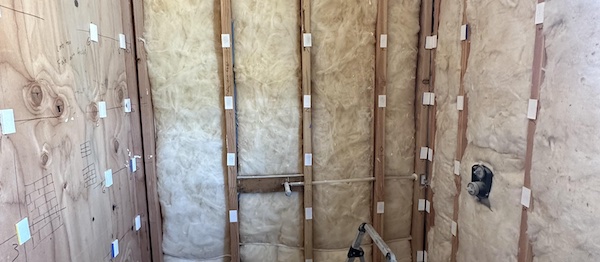
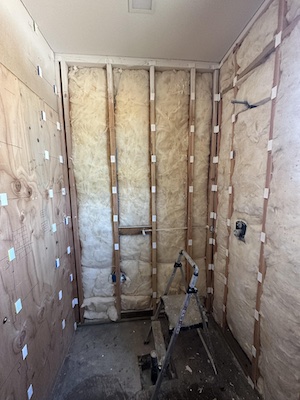
Most installers would agree that a well-prepared wall substrate will yield excellent results, but the question is, what does a well-prepared substrate include?
Let’s turn to the ANSI manual for a start:
ANSI A108.02-4.1.4.3.2 Vertical surfaces: For tiles with all edges shorter than 15 in. (0.38 m), the maximum allowable variation is no more than 1/4 in. in 10 ft. (6 mm in 3 m) and no more than 1/16 in. in 1 ft. (1.6 mm in 0.3 m) from the required plane, when measured from the high points in the surface. For tiles with at least one edge 15 in. (0.38 m) or longer, the maximum allowable variation is no more than 1/8 in. in 10 ft. (3 mm in
3 m) and no more than 1/16 in. in 2 ft. (1.6 mm in 0.6 m) from the required plane, when measured from the high points in the surface.
With large-format tile accounting for the majority of today’s tile, the substrate tolerance must meet this ANSI requirement. This makes the tile installer’s task even more precise and complicated. It must be right the first time.
The National Tile Contractors Association (NTCA) NTCA Reference Manual contains a helpful document entitled, “White Paper Wall-Flattening Products.” It states:
“To flatten walls to meet these tolerances, products specifically manufactured for this purpose should be used. In many cases the use of thin-set mortars may exceed the intended purpose and product limitations designed by the manufacturer. Many manufacturers make products specifically designed to flatten wall surfaces to meet industry tolerance. All products should be used in accordance with the manufacturer’s installation instructions and directions. As with all installations, it is best to use one manufacturer’s products on any single project in order to maintain a single source product warranty that covers the entire system. If single product sourcing is not available, check with the manufacturers used to confirm compatibility among products.”
> > > The 2023-24 NTCA Reference Manual
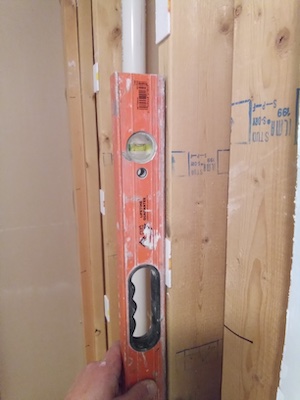
According to the American National Standards Institute (ANSI) A108.02-4.1.4, surfaces to receive tile shall be plumb, level, and true with square corners. However, installers would also be quick to say that jobsite conditions rarely provide these attributes.
Obtaining a plumb and flat wall
There are several methods currently being used to obtain a plumb and flat wall substrate as listed below:
• Dry shimming
Drywall shims are a factory-produced, smooth pasteboard product, usually 1-1/2″ x 45″ x 0.055″ (slightly less than 1/16″), used on the jobsite to help correct bowed or twisted studs, fill low spots, and/or repair out-of-plumb corners of interior wall framing. The shims are applied to the face of the studs in varying layers to accommodate the deficiency and are stapled, glued, or screwed to the studs just prior to the tile underlayment application, which can proceed quickly.
15# roofing felt, normally used as an underlayment beneath roof shingles, can easily be cut into strips the same width as a wood stud and stapled to the stud face to correct the above-mentioned issues. Felt is reasonably priced but it does require the installer to cut the strips, which is a labor-intensive activity. Backer board and tile installation can proceed immediately.
Sistering with studs or furring strips requires the tile mechanic to establish a flat and preferably plumb wall substrate by attaching an additional stud or furring strip next to the offending framing over the entire wall. This method works well but is labor-intensive, plus the cost of new lumber may potentially escalate the cost of the installation.
• Wet shimming
Wet shimming involves the application of thin-set mortar to the face of the wood stud prior to the installation of the wall substrate, many times a foam board. While the thinset is still in a fluid state, the installer uses a long straight edge to press the board into a flat plane horizontally while also plumb. A limited number of fasteners are used at this point to hold the board in place until the thinset stiffens. Additional fasteners are installed per the manufacturer’s recommendations the following day. This method requires the installer to purchase more thin-set mortar to flatten the substrate. Plus part of the day is spent allowing the thinset to harden before proceeding.
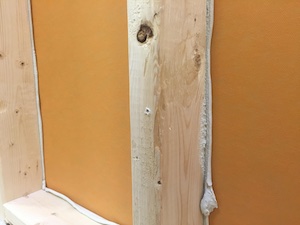

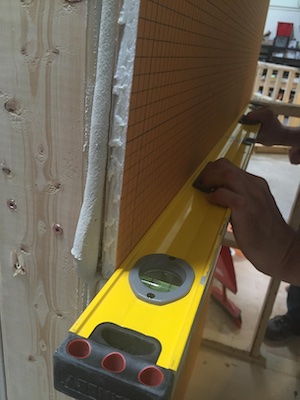


• Foam blocks: Factory-produced foam blocks of various thicknesses are applied to the existing studs to create a flat – and preferably also plumb – wall substrate. The blocks are placed in the same location as required by the backer board fastening schedule. When the foam block installation is completed, the backer board can be applied immediately.
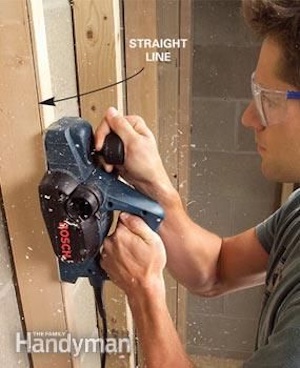
• Power planer: A carpenter’s power planer being used to flatten wall studs that are warped out, bowed, and/or twisted toward the center of the room is an efficient way to create a flat wall. The bowed studs are effectively shaved down to achieve a flat and preferably plumb wall surface. This method works very well while being very efficient time wise. However, this method only corrects the studs that are bowed outward which necessitates one of the above shimming methods to build out the low areas. Additionally, the installer must meticulously remove all previously-installed nails, staples, or other fasteners. If these old fasteners are not gone before the power planer is used, the blades will be permanently damaged and may need to be replaced. The positives of the shaving method are the speed of operation as well as the ability to install the backer board immediately.


• Trowel-applied patch on the new or existing wall substrates works well to flatten the substrate. But most times this method does not correct an out-of-plumb situation that must also be done. This method should be completed before the application of waterproofing products. Also, this method must be allowed to set up prior to the installation of the tile.
It is wise to understand that these wall substrate correcting methods and products are not currently listed in the Tile Council of North America (TCNA) Handbook or the ANSI specifications. However, the ingenuity of tile installers, as well as others in the marketplace, have created these products to meet the expectations of the tile consumer. Details on the Schluter wet shimming are available at How to Wet Shim KERDI BOARD over Studs|Schluter at http://tinyurl.com/Schluter-Wet-Shimming. Here are two sources for foam blocks used to flatten and plumb the wood studs: Flat Shim Strips – Rodkat Installation Innovations at rodkat.com/product/flat-shim-strips/ and Wall Flattening Shim Kits – Built with Foam at builtwithfoam.com/product/wall-flattening-shim-kits/.
Given the options presented, you decide which method works best for you.


Scott Carothers
Scott Carothers is the Acdemic Director for the Ceramic Tile Education Foundation (CTEF) and is responsible for the creation of the Certified Tile Installer (CTI) program, and is involved in the creation of the Advanced Certifications for Tile Installers (ACT) program as well as providing training to others in the tile industry.
Carothers has been involved in the ceramic tile industry for nearly 40 years and was the owner of a successful retail and installation firm prior to CTEF. He has served as President and Chairman of the Board of the National Tile Contractors Association (NTCA), Chairman of the NTCA Technical Committee, was named the NTCA Tile Person of the Year in 2005, and the NTCA Ring of Honor recipient in 2013. He is a voting member of the ANSI and the TCNA Handbook committees.


