


One thing is certain, tile installers almost never want a tile inspection performed on one of their projects. The reason is a tile inspector is usually called onto a project when there are questions about the quality or integrity of the work. If that is the case, it’s usually too late and a qualified inspector with industry-related trade experience and qualifications will find out if the work was installed correctly or not. The fact is, when an installation is installed correctly, inspections are nothing to worry about and are easy to avoid.
What inspectors look for in a finished tile installation
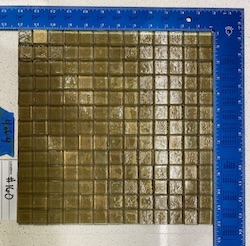
There are countless applications involving a wide array of tile and stone materials that will drive the key objectives of a tile inspection. However, there are common themes found that are omnipresent to most installations regardless of the specific application.
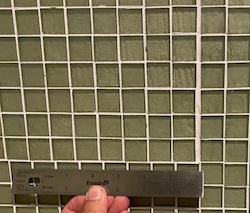
Workmanship: The first thing that normally sticks out when inspecting a completed job is workmanship. The quality of workmanship will always show itself front and center whether it’s good or bad. This is commonly seen in the appearance of the cutting, fitting, layout, and placement of tiles. If a tile project is laid out properly, installed with uniform and straight grout joints, installed with quality cutting and fitting, and with tiles placed flush with one another without excessive lippage, then it will show itself well. When they are not installed correctly, then they usually jump right out and add a distraction to an otherwise acceptable install.
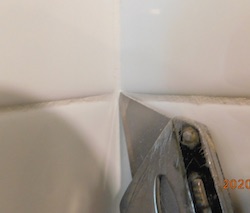
Movement joints: After workmanship is observed, movement joints are typically the next thing documented. Unfortunately, there are many installations where it is simply documented that movement joints were not installed properly or at all. Other items that are usually looked for during a visual inspection are signs of failure such as cracking, evidence of deterioration of tile or stone materials, or anything that stands out such as staining or signs of excessive moisture.
Sounding survey: While not an aesthetic item that can be seen, a common process that inspectors perform is a sounding survey. Sounding is performed with varying devices such as a steel ball bearing or a device manufactured for this process called a delamination detection tool (DDT). The device is tapped or moved over the surface of finished tile, which will at times cause solid or hollow sounds. The key to sounding is not the hollow sounds themselves – as hollow sounds alone are not a defect – but the variation in sounds that can be present in a single application and in single tiles. The variation of sounds in many applications – such as direct bond over concrete – is often caused by voids in the adhesive mortar. Hollow sounds can be common in some tile installations and are often not a concern themselves without other notable deficiencies.
Top tips for inspecting a tile job
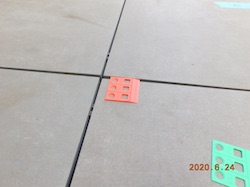
The most important guideline when inspecting a tile job is getting proper documentation. This begins but does not end with photographs. Not only should there be a plethora of photos showing all conditions, but getting the correct documentation required in a photograph is the true key to it all. For example, if inspecting a tile job with lippage concerns, photos showing the precise measurement of lippage will be important. Many projects with lippage complaints have lippage within industry tolerances so it would be imperative to capture this correctly.
Of additional importance to capturing the correct evidence in photographs is a properly written account of findings and the installation. The items should include clear reporting on all relevant information such as the time and date of an inspection, the location of key evidence within the installation, and proper labeling descriptions that will be captured in the photographic evidence.
Another important item is to stay focused and determined to document the factual conditions of the installation without prejudging it. It can be easier said than done, but it is important to let the installation and the evidence tell the story, whatever it ends up being. One opinion that can and should be carried into an inspection is one aligned with our industry standards and manufacturers’ written installation guidelines.
Leaders of the pack: three factors in installation woes
There are many items that can lead to tile installation problems but a few of them almost always lead the pack. No surprise: one of the frontrunners is when movement joints are not installed or not installed properly. Installing movement joints correctly is one of the most important steps to be performed in order to help avoid problems.
Leading the pack along with movement joints is a lack of proper adhesive mortar coverage and contact. Single direction troweling may be the most important three words when it comes to installing tile and stone successfully. The single direction troweling method, along with using the proper mortar and trowel size, will help make tile coverage well within industry tolerances by creating uniform contact throughout, including all corners and edges.

Proper substrate preparation is another primary step that installers can take to help avoid potential pitfalls. In particular, making sure the substrate meets flatness tolerances before any tile is set is critical to allow tile to be set flat. Another key step in substrate preparation is performing a water droplet test. The substrate surface that tile will be bonded to should readily absorb water droplets. If water droplets remain on the surface and do not readily absorb then it likely needs some work such as scarification.
These three important steps are imperative to keep in mind when installing tiles: installing movement joints, obtaining proper coverage by employing single direction troweling, and performing proper substrate preparation. When these three steps are taken and tiles are installed with good workmanship, then tile inspections can be worry free.

Kent Klaser
Kent Klaser is a long-time tile and stone industry professional with over twenty-four (24) years of professional experience. He learned the craft of installing ceramic tile and stone in a family owned commercial contracting business. He has been certified as a Ceramic Tile Consultant (CTC) through the Ceramic Tile Institute of America (CTIOA) since 1998. He became the family companies responsible managing officer (RMO) for the California contracting licenses, C54 Tile (Ceramic and Mosaic) in 2008 and a C29 Masonry license in 2012. Kent served as a board member for National Tile Contractors Association (NTCA), and serves on the NTCA Technical Committee that helps establish industry standards. He participates in ANSI, ASTM, and NTCA committees. He is member of the Construction Specifications Institute (CSI) and has been certified as a Construction Document Technologist (CDT). He is the RMO for active California contracting License #1008576, classifications C29 & C54. He graduated with a Bachelor of Science degree in Business Administration in 1995. Kent is considered an expert in ceramic tile and natural stone installations.


