


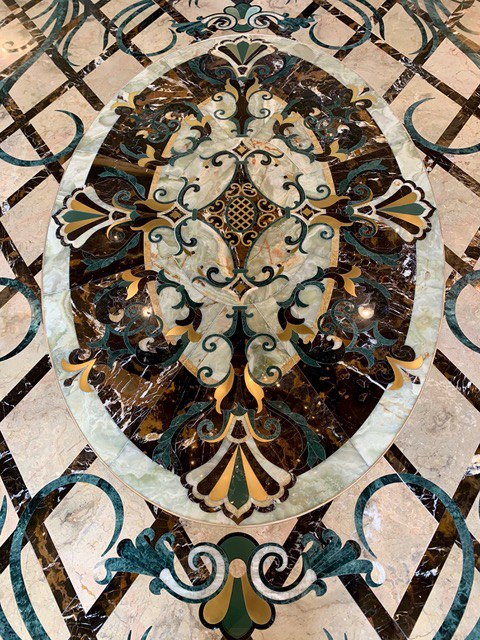
It is not breaking news that tiles are made in all colors and shapes and sizes and thicknesses and materials. They each have their own beauty, and tiles of all types and sizes are regularly mixed together to create stunning installations with purpose and function that stand the test of time when properly engineered, specified, designed and installed.
This article focuses on installing mosaic tiles that have been pre-assembled into a pattern on sheets of mesh, paper or plastic. But first, a little information about mosaics.
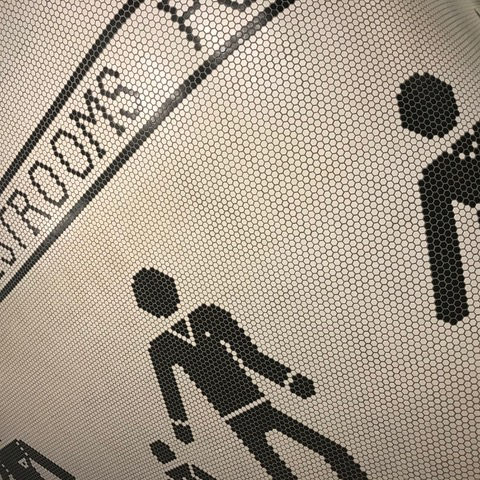
What are mosaics?
The American National Standard Specification for Ceramic Tile (ANSI A137.1) defines ceramic mosaic tile as: Tile, usually 1/4” to 3/8” thick, and having a facial area of less than 9 square inches. Such tiles are typically mounted in sheets or strips with other mosaic tiles.
Where do mosaics come from?
Many tile manufacturers create mosaic tiles for one-of-a-kind and general pattern installations. The tile industry has a host of notable tile artists who create one-of-a-kind hand-crafted mosaics. By their nature, many tile installers are craftspersons with artistic skills. The Tile Trade Artisans Guild Facebook group is dedicated to encouraging artistry in the trade.
How are mosaics mounted?
Mosaics can be edge-mounted. Flexible glue is applied to the tile edges, leaving the back of the tile open for full contact with the bond coat. Paper or plastic can be applied to the face of the tile leaving the back open for full contact with the bond coat.
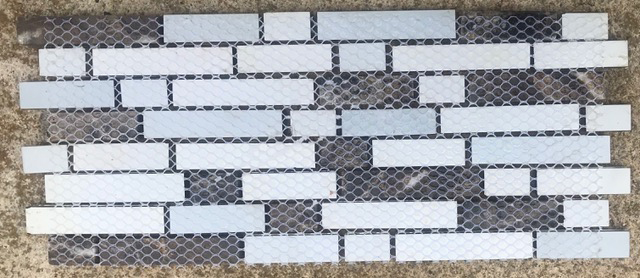
It is important to note that when mesh is applied to the back of the tiles it will become an integral and permanent part of the tile installation. There must be sufficient openings in the mesh netting to allow for adequate, direct contact of the bond coat to the back of the tile. If mesh mount tiles are to be installed in an exterior, wet or submerged installation, the mesh must be suitable for exposure to water.
A common concern with installers is how straight or crooked the mounted mosaics are. It can be tedious work to straighten crooked tiles that are stuck to a sheet. For readers interested in acceptable variations of mosaics mounted to a sheet, open up your copy of ANSI A137.1, study Table 6 and read section 9.5 Test Method For Mounting Variations.
How are mesh and face mount mosaics installed?
First, examine your substrate. Is it flat? If not, stop the installation and start the conversations that lead to making the substrate flat. Is there a membrane in place? This will affect cure time, especially for glass mosaics and plastic face-mounted mosaics.
Proper bedding procedures: For an outstanding description on how to properly bed mosaic tiles (set into mortar), pull out your 2019/2020 NTCA Reference Manual and read pages 108 – 110.
Mesh and face mount mosaic installation instructions:
- Check the substrate for flatness.
- If the substrate is not flat, make it flat. (Attend an NTCA Regional Training program to learn the skills, tools, and materials to do this.)
- Check the area to be tiled for squareness.
- Calculate the best, most defensible layout and consider the primary focal point and use. (Attend NTCA virtual and in-person workshops to learn how to do this. For more information, read the Training & Education story in this issue.)
- Apply a grid system for the layout to follow.
- Clean the substrate.
- Dampen dry substrates.
- Mix the mortar, following manufacturer instructions.
- Key the mortar into the substrate with the flat side of the trowel.
- Use the gauged side of the trowel to apply more mortar. Hold the trowel at a consistent 45-degree angle and trowel the mortar into straight ridges.
- Prime the trowel by applying a ridge of mortar along the length of the flat side of the trowel.
- Hold the primed trowel at a shallow angle then drag it, flattening the ridges to create a consistent, bond coat layer consistently 3/32” to 3/16” thick (approximately).
- Set the tile into the mortar.
- Use a solid, flat trowel, float, or similar tool to embed the tile into the freshly troweled bond coat layer. Press well enough to ensure a minimum bond coat of 80% (dry areas) and 95% (wet areas) without forcing excess mortar into the grout joints. Bond coat coverage percentages are for each individual mosaic tile. Pull some tile to check for coverage. Change your trowel size if needed. Practice your technique.
Mesh mount-specific instructions:
- After setting the tile and making sure bond coat coverage is achieved, align the tiles to ensure there are no sheet lines.
- Insert the long, clean edge of a straight, flat trowel into the joints and use it to align the mosaics within the sheet and align the joints from sheet to sheet. A soft grout float can also be used to shift the tile.
- Stagger sheets as you install them to blend the grout joints from sheet to sheet.
- Cut squares or rectangles from sheets to overlap sheets as you install them, blending grout joints from sheet to sheet.
- Step back from your work and take photos of small sections as you set them. Sheet lines can be much more visible in a photo than when you are focused up close. Examining your work in this way as you go allows you to see sheet lines that you couldn’t while setting and make adjustments while they are freshly set.
- Use hard shims, spacers, wedges, or apply tape to the surface to hold tiles in place while they cure.
- After curing, clean squeeze-through mortar before grouting and applying sealant at movement and expansion joints and changes in plane.
Paper face-specific instructions:
- After setting the tile and making sure bond coat coverage is achieved, align the tiles to ensure there are no sheet lines.
- Stagger sheets as you install them to blend the grout joints from sheet to sheet.
- Cut squares or rectangles from sheets to overlap sheets as you install them to blend grout joints from sheet to sheet.
- Allow the set tiles to cure in place for 15 to 30 minutes (depending on the paper and adhesive).
- Apply a damp sponge to the paper face to moisten it and hydrate the glue that holds it to the face of the tile. Don’t get it so wet the paper will fall apart. Don’t let it be too dry so the paper tugs tiles out of alignment while you remove it. Practice.
- Pull the paper from one corner or edge of the tile at an angle across the face of the sheet until the paper is off. If the tiles shift or pull out of the mortar – allow the mortar to cure longer and try again. To reduce the amount of pulling force, try using a knife to slice the paper into smaller sections and pull along the short side of the section.
- Adjust individual tiles as needed. Insert the long, clean edge of a straight, flat trowel into the joints between tiles and use it to align the mosaic.
- Step back from your work and take photos of small sections as you set them. Sheet lines can be much more visible in a photo than when you are focused up close. Examining your work in this way as you go allows you to see sheet lines that you couldn’t while setting and make adjustments while they are freshly set.
- Use hard shims, spacers, wedges, or apply tape to the surface to hold tiles in place while they cure.
- After curing, clean squeeze-through mortar before grouting and applying sealant at movement and expansion joints and changes in plane.
Plastic face-specific instructions:
- After setting the tile and making sure bond coat coverage is achieved, align the tiles to ensure there are no sheet lines.
- Stagger sheets as you install them to blend the grout joints from sheet to sheet.
- Cut squares or rectangles from sheets to overlap sheets as you install them to blend grout joints from sheet to sheet.
- Allow the set tiles to cure in place until firm. Usually at least overnight.
- CAUTION: The plastic on the face of the tile will cause a longer cure time for the mortar. Many mortars cure through the grout joints. Because the
plastic covers most of the grout joints, the mortar will take longer to cure. - Pull the plastic from one corner or edge of the tile at an angle across the face of the sheet until the sheet is off.
- Clean squeeze-through mortar before grouting and applying sealant at movement and expansion joints and changes in plane.
I hope to see your next mosaic installation posted on NTCA’s social media channels! Have fun tiling and I’ll see you next time!

Mark Heinlein
Mark Heinlein, CTI#1112, is the former Training Director for the National Tile Contractors Association (2015-2024) and a former Ceramic Tile Education Foundation evaluator for the Certified Tile Installer program. Heinlein owned Mark Heinlein Surfaces of Negaunee, Michigan prior to working with NTCA.


