


Tile installation has numerous industry standards, methods, and details that must be followed to obtain a high-quality job that will stand the test of time. This is especially true – and critical – when it comes to installing tile products on stairs, ranging from a small set of residential wood steps to large commercial pan-filled stairs.
First step, heed the American National Standards Institute (ANSI) requirements for stair installations:
A108.01-2.4 Backing surfaces: Ceramic tile can be installed over horizontal and vertical building surfaces by one or more methods described in these documents. Tile can be installed directly over sound, clean, and dimensionally-stable surfaces with one of the thin-set methods, or with a mortar bed method.
2.5.2.1 Suitable backings, in part, states: Prepared suitable backings include plumb and true masonry, concrete, lean portland cement mortar and cured portland cement mortar (cured conventional setting beds), cementitious backer units, brick, and ceramic tile.
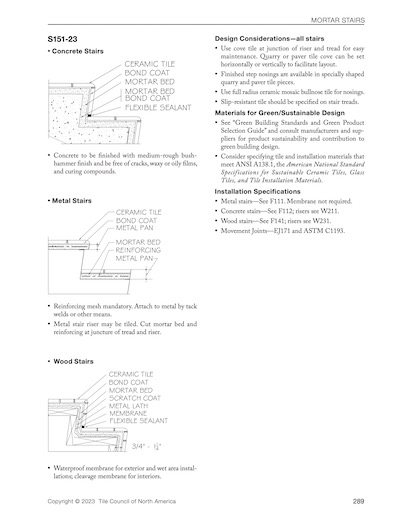
The ANSI specifications do not speak specifically to stair tile installation. But the Tile Council of North America (TCNA) Handbook addresses it in method S151 (page 289 of the 2023 edition) including a section devoted to the installation of tile on stairs in three categories including Concrete Stairs, Metal Stairs, and Wood Stairs. This detail includes tile that is recognized by ANSI A137.1 Ceramic Tile – namely mosaic tile, quarry tile, pressed floor tile, and porcelain tile, but it does not include natural stone tile.
Handbook Method S151
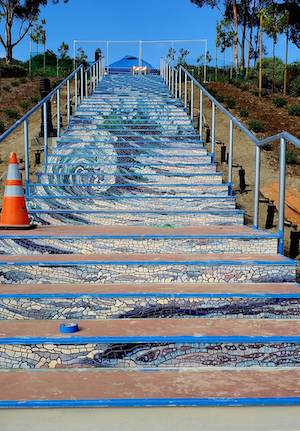
Concrete Stairs

Method S151 for Concrete Stairs on Handbook page 289 states: “Concrete must be finished with a medium-rough bush-hammer finish and free of cracks, waxy or oily films, and curing compounds.”
This method includes tile set on a mortar bed that is bonded to the existing concrete stairs. In this method, which is similar to floor tile method F112, the tile is bonded to the cured mortar bed. Similarly, the stair risers can be tiled by using method W211.
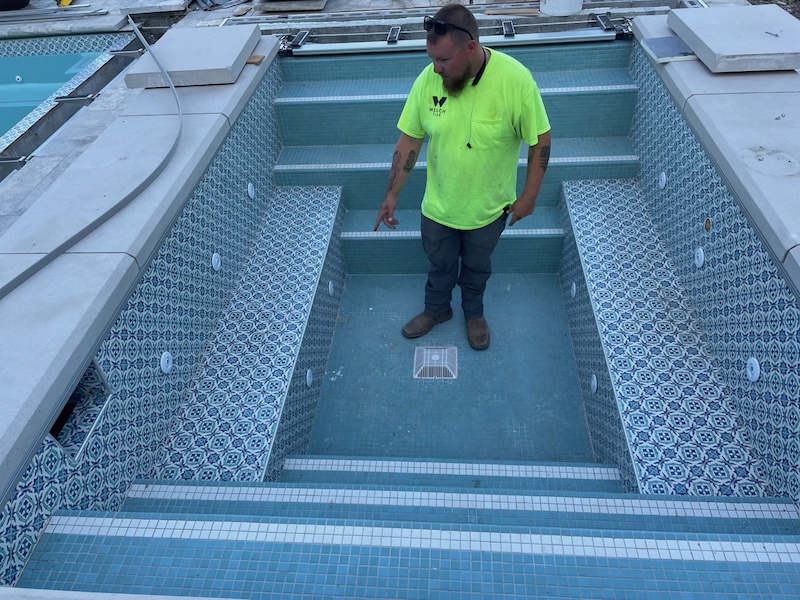
In addition to this S151 method, tile can be successfully installed using the direct-bond method. If the interior concrete steps receiving tile are properly prepared, tile can be installed using a method such as F113. When the project calls for tile to be installed in an exterior application, it can be installed by using F102, which may require the use of a waterproof membrane. When tile is installed on an exterior or pool job, the ANSI required 95% mortar coverage and transfer to the tile back is extremely critical to achieve success.
Handbook Method S151
Metal Stairs
Metal stairs or, as commonly known in the design community as pan-filled stairs, are normally used in commercial settings, especially in exit stairways due to their high fire resistance. The metal stair framework is fabricated off-site and erected on the job. Once installed, the recesses built into the step tread or pan along with the landing are filled with concrete (normally at 1-1/2″ thick) and allowed to cure. The selected tile is normally bonded to the pan by using a modified or improved modified dry-set cement mortar or whatever is specified on the job by the architect or design professional.
Handbook Method S151
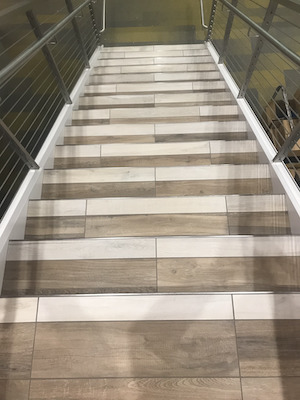
Wood Stairs
This method calls for a membrane or cleavage membrane placed on the wood structure, followed by a 3/4″ to 1-1/4″ unbonded reinforced mortar bed that is referenced to method F141. The riser of the stairs can also be tiled by using method W231.
Wood stairs can also be successfully tiled by applying a layer of backer board as seen in one of the Handbook backer board methods, such as F144, along with adherence to the manufacturer’s installation recommendations.
One word of caution. Normally, residential stairs are 36″ – 40″ wide and are supported by three wood framing members known as stringers. All the details mentioned here are associated with tile installed with a maximum joist spacing of 16″ on center, but be aware that the support spacing of the above-mentioned stair support would 18″ and 20″ respectively. Before installing tile on wood stairs, be certain the structure will support the additional weight load and meet the deflection guidelines.
With all these installation methods, movement joints are vital to success. These details are found in the Handbook under EJ171 or can be accomplished by using a manufacturer-provided movement accommodation profile that should be incorporated into the finished product to absorb the anticipated movement, thereby eliminating unsightly cracks.
Tile trim availability
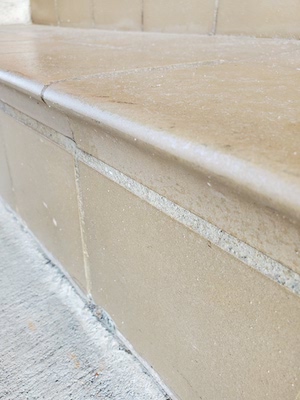
Numerous tile manufacturers provide a bullnose (round edge) trim for use on the step edge. Unglazed porcelain tile, quarry tile and unglazed mosaic tile offer excellent durability in this application since the color is throughout the body. If minor damage occurs, most times it will not be objectionable.
Glazed floor tile, which offers a bullnose tile, can be used, but the glazed edge may be susceptible to chipping. The objection here is that most times the tile glaze is a different color than the body. However, this situation can be eliminated by using a profile on the step edge (see below).
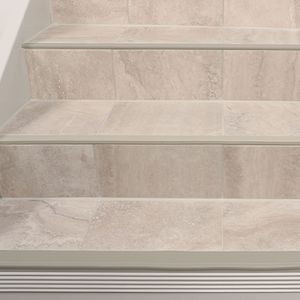
Profiles and treads
Numerous manufacturers provide edge profiles that protect the tile edge while also covering the top of the riser for a neat and clean transition. Step tread products are also available to provide a non-slip tread surface which increases the safety of the person using the steps. Most of these products are installed during the tile installation to offer a durable finish.
Local code for tread and riser size
The International Residential Code (IRC) and the International Building Code (IBC) (commercial) have established requirements for safe stair installations. Although both codes are throughout the United States, each local jurisdiction has the right to either accept them or adopt their own code requirements. Knowing this, it is always wise to verify the local requirements for the size of the step tread and riser (the vertical surface at the back of the tread) before beginning a stair installation.
Per these codes, the minimum tread size is 10″ including the nosing that extends over the riser or 11″ without a nosing. The riser must be a minimum of 4″ and a maximum of 7″. However, single family (residential) risers may be a maximum of 7-3/4”. Both the treads and risers are not permitted to vary in size by more than 3/8”.
Tiled stairs offer a distinctive look that is long-lasting and easily maintained if they are installed per the industry guidelines and local building codes.

Scott Carothers
Scott Carothers is the Acdemic Director for the Ceramic Tile Education Foundation (CTEF) and is responsible for the creation of the Certified Tile Installer (CTI) program, and is involved in the creation of the Advanced Certifications for Tile Installers (ACT) program as well as providing training to others in the tile industry.
Carothers has been involved in the ceramic tile industry for nearly 40 years and was the owner of a successful retail and installation firm prior to CTEF. He has served as President and Chairman of the Board of the National Tile Contractors Association (NTCA), Chairman of the NTCA Technical Committee, was named the NTCA Tile Person of the Year in 2005, and the NTCA Ring of Honor recipient in 2013. He is a voting member of the ANSI and the TCNA Handbook committees.


