For our Large-Format Tile section this month, we take a look at three individual jobs that utilized large-format tile, and we explore the procedure and materials needed to achieve a quality, high-performance, long-lasting job. All contractors are NTCA Members, and all either are themselves Certified Tile Installers, or employ them in their crews.
Charles Nolen, Carpet Corner of Indiana
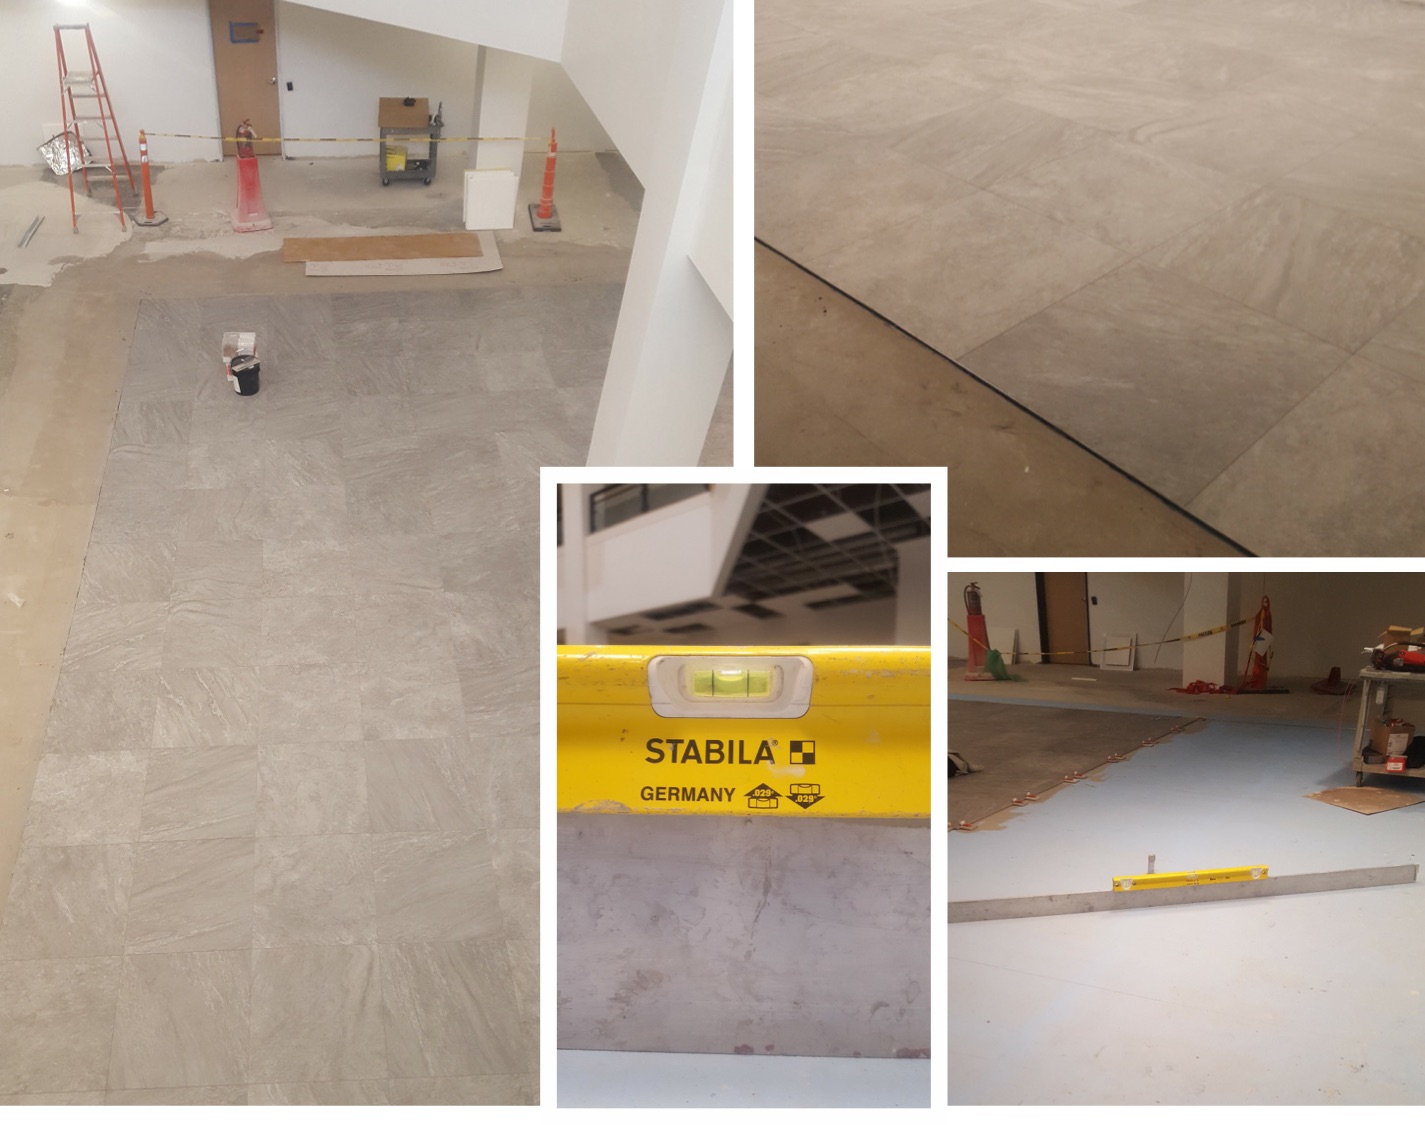
This 1,500-sq.-ft. job by Charles Nolen for Carpet Corner of Indiana utilized 30” x 30” large-format porcelain tile from Atlas Concorde’s Brave line at the Lilly Company in downtown Indianapolis.
To get a level floor, the three-person crew used a diamond-head grinder to open the pores in the slab, then Nolen – a Certified Tile Installer since 2016 – said they shot it with a 360-degree laser to find the lowest point. They then gridded the floor in 4-ft. sections, and placed a pin at every intersection of chalk lines. Pins were trimmed to the lowest level height measurement, and a special solvent-free, acrylic primer was poured, followed by a self-leveling underlayment to the determined height, assuring a “dead level and perfectly flat floor.”
The crew – Nolen, along with his son Caleb Nolen and Reece Stepler – used expansion foam around the perimeter of the room, and applied three coats of a topical crack-isolation membrane. Only then were the 30” x 30” tiles installed with a multi-use, polymer-fortified adhesive mortar to “achieve a flawless tile assembly that will stand the test of time,” Nolen said.
Erin Albrecht, M.Ed., J&R Tile
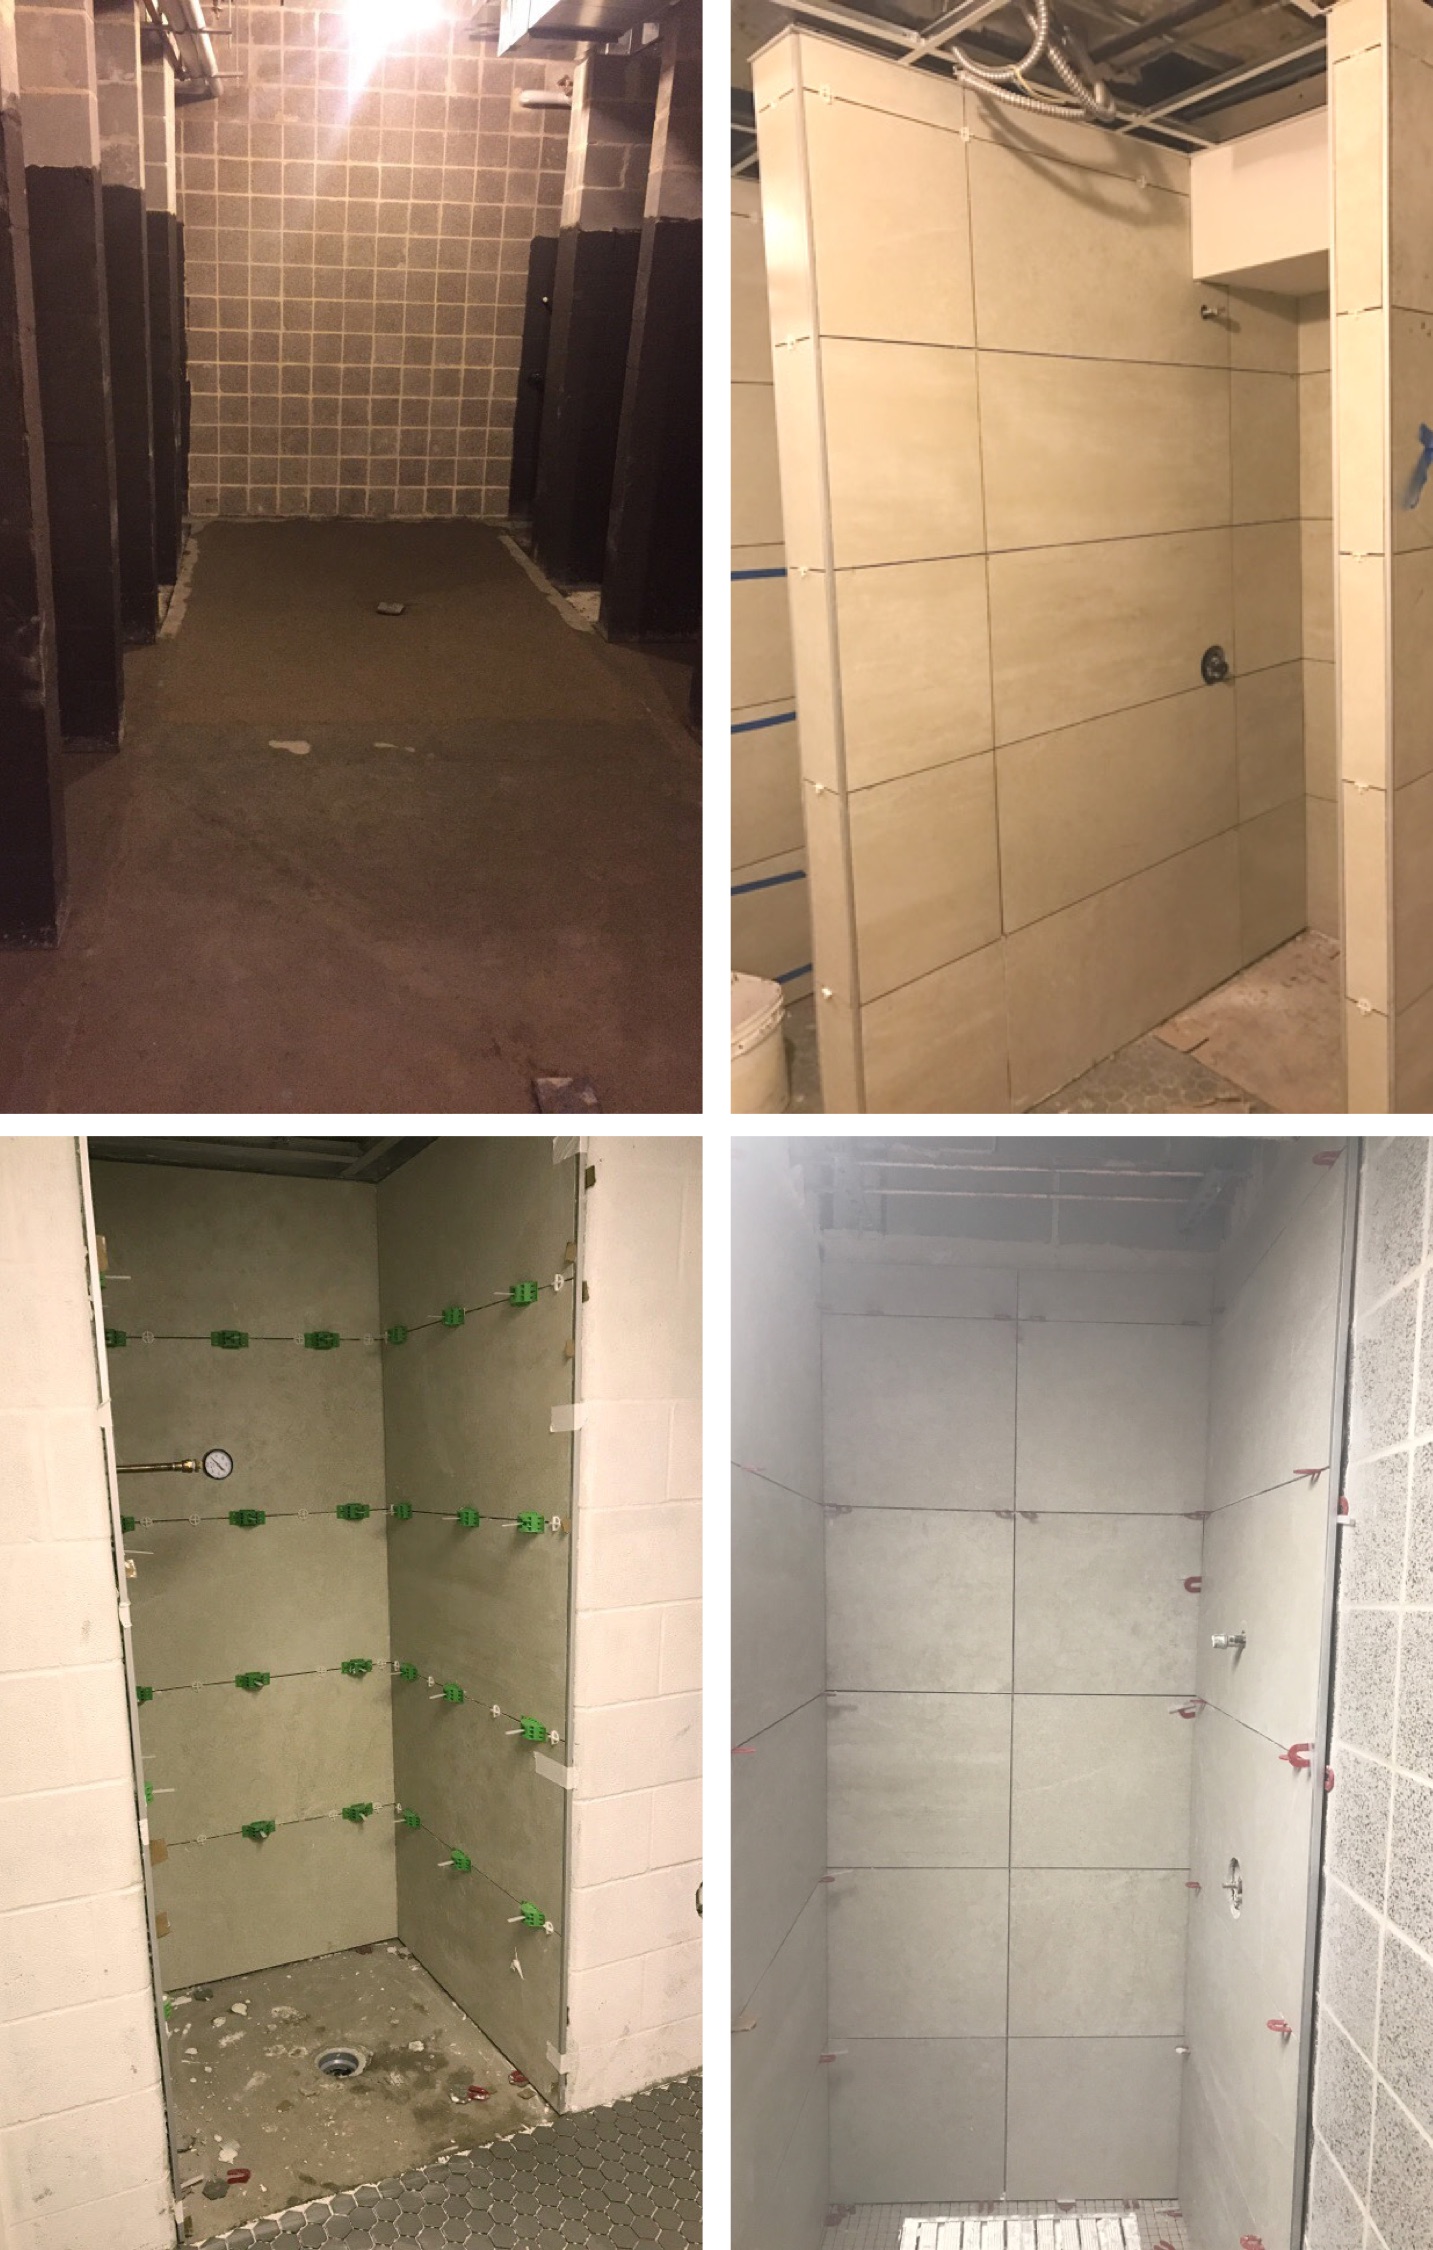
“We are especially proud” of this design build at Trinity University that features Florida Tile Level 10 HDP-High Definition Porcelain 18” x 36” in Pearl Atrium installed with a 1/8” joint, said Eric Albrecht, M.Ed., of J&R Tile.
The project was a total $8 million renovation. J&R saved the client “loads of money on an epoxy grout spec, and the [originally] speced tile was thicker, smaller and more expensive,” she added.
J&R’s Adam Arrellano, who holds CTI and Advanced Certifications for Tile Installers credentials, was the 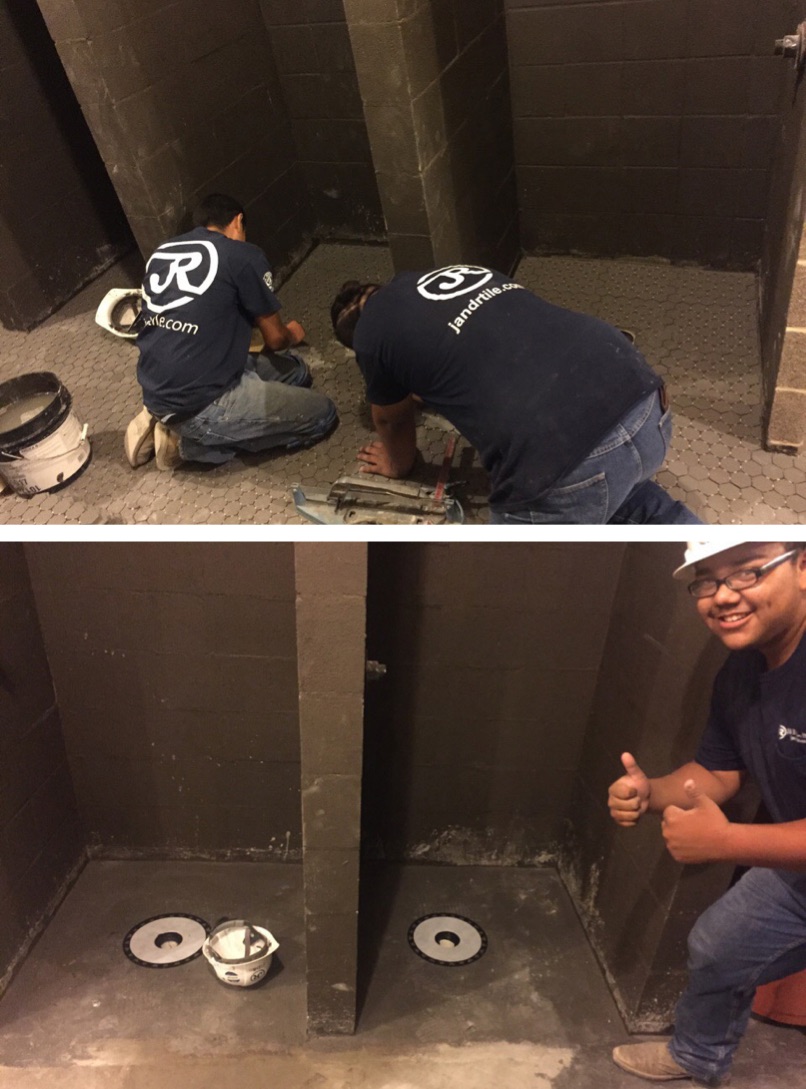

The cinderblock substrate was waterproofed with two coats of liquid-applied waterproof over concrete masonry units (CMU). J&R used deck mud and custom floating for positive drainage to over 20 integrated bonding flanges to achieve point drainage. Florida Tile’s 2” x 2” mosaic hex was also installed on floors, and extruded aluminum profiles were chosen as an elegant cost-saving solution instead of bullnose and sanitary cove.
Robert Davis, Davis Solutions
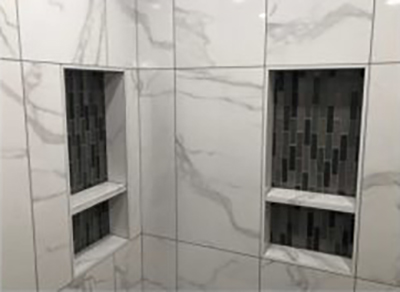
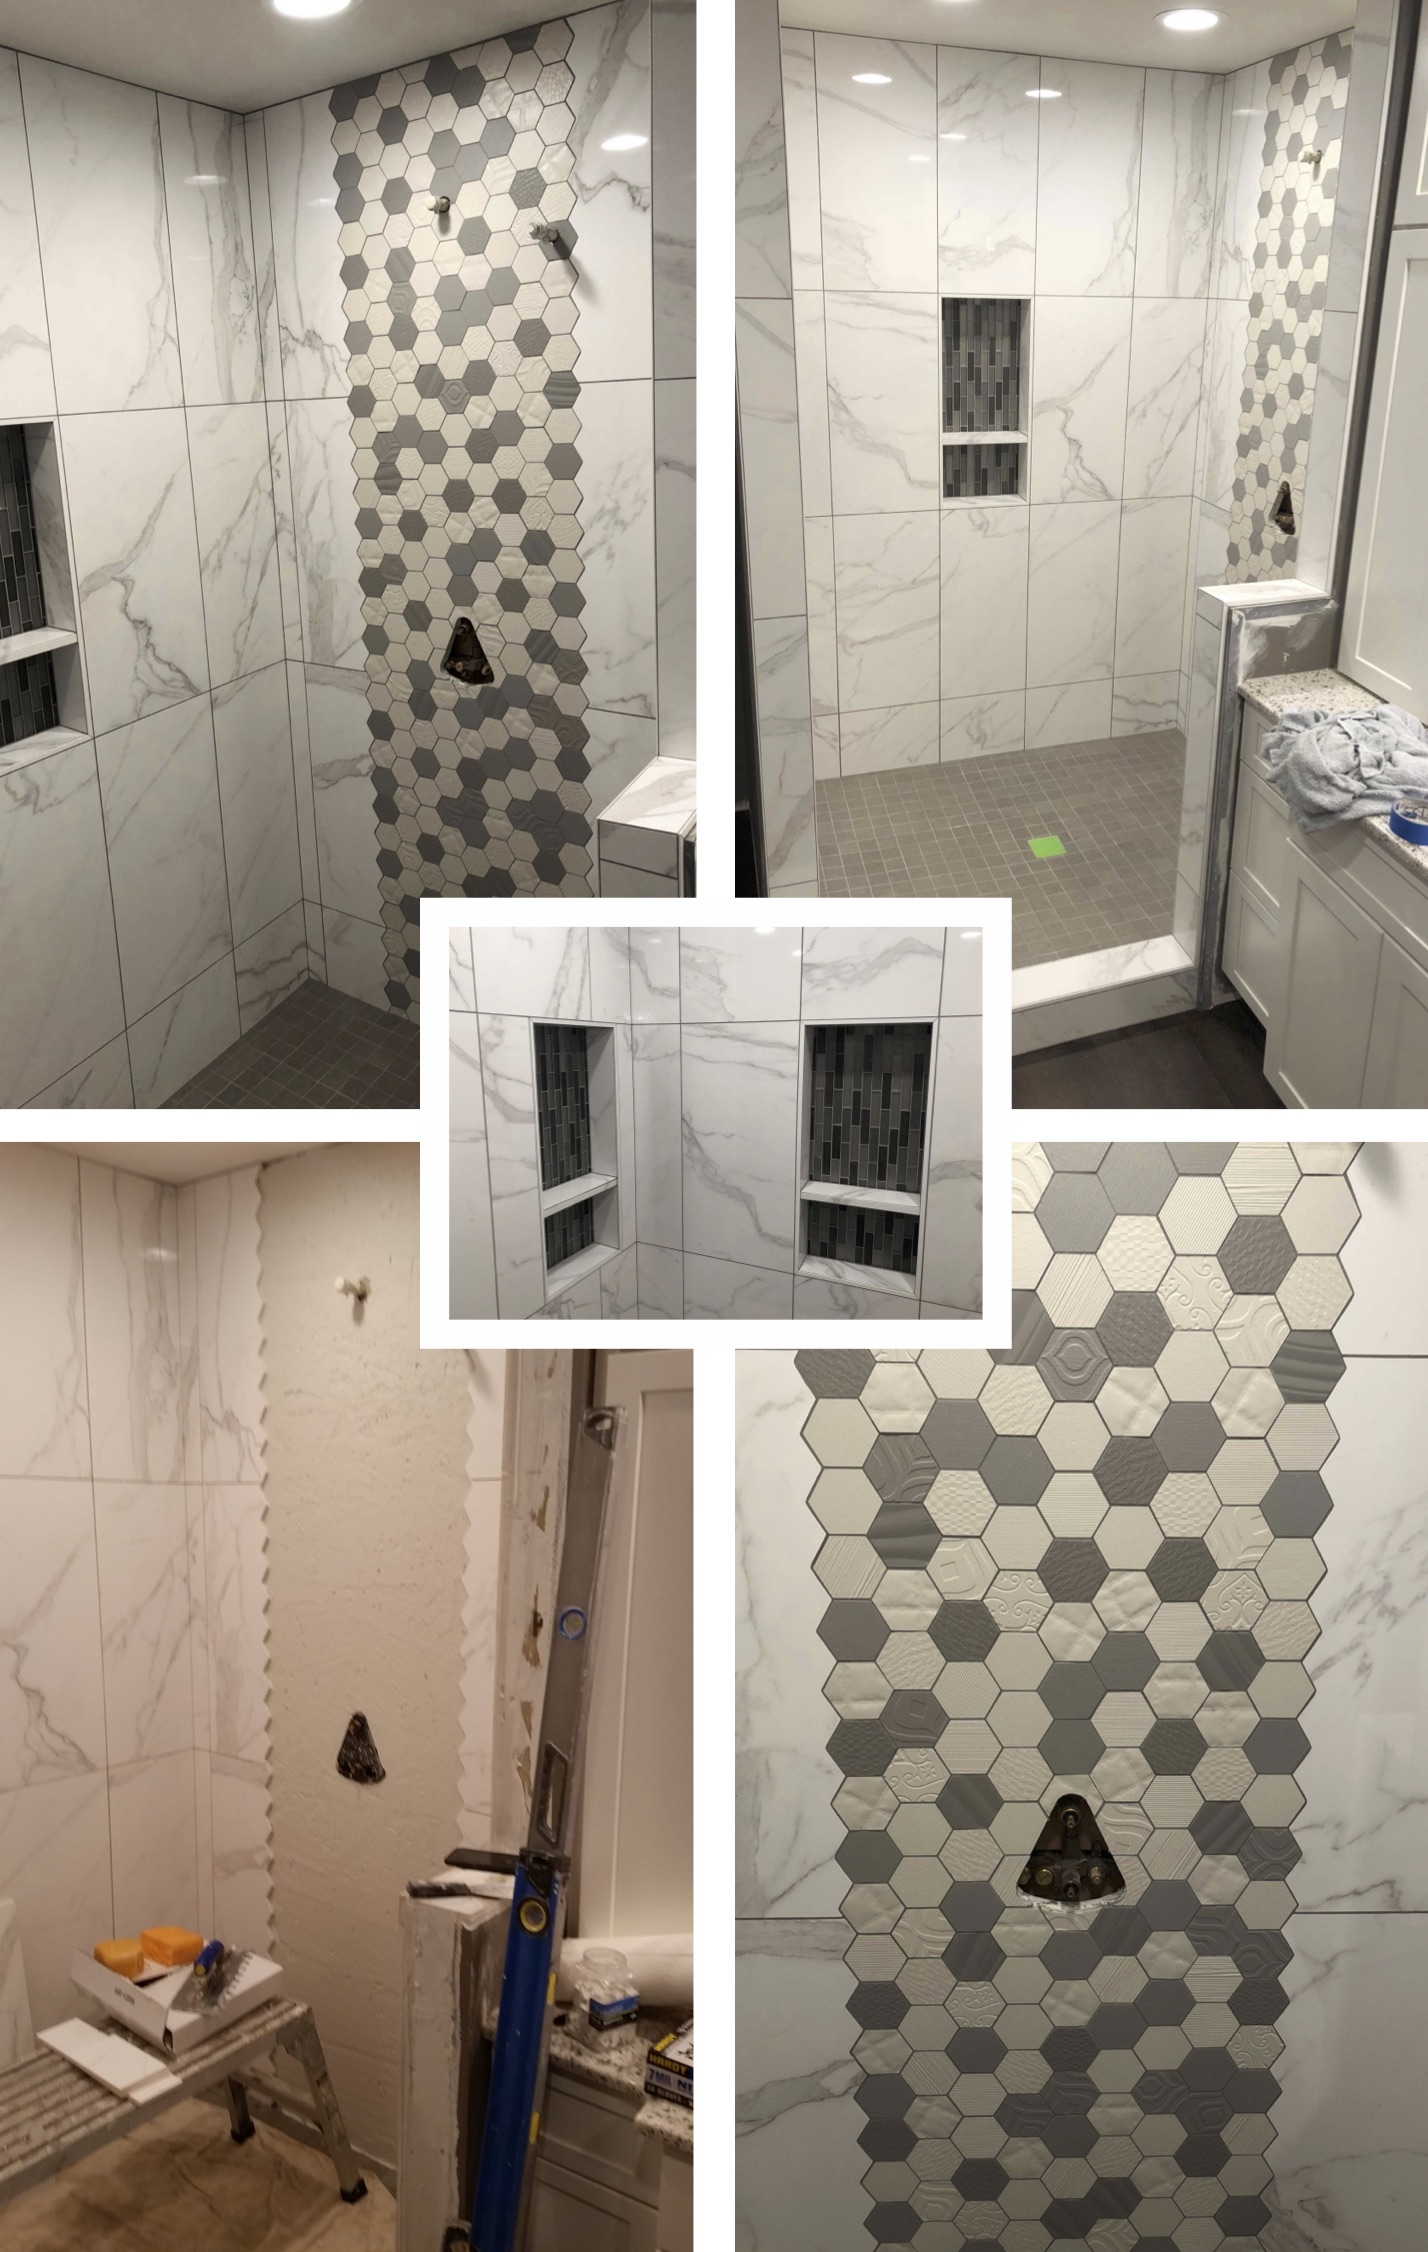
Robert Davis, owner of Davis Solutions in Lebanon, Oregon, shared this recent shower project. “It was a lot of fun to have free rein with design.”
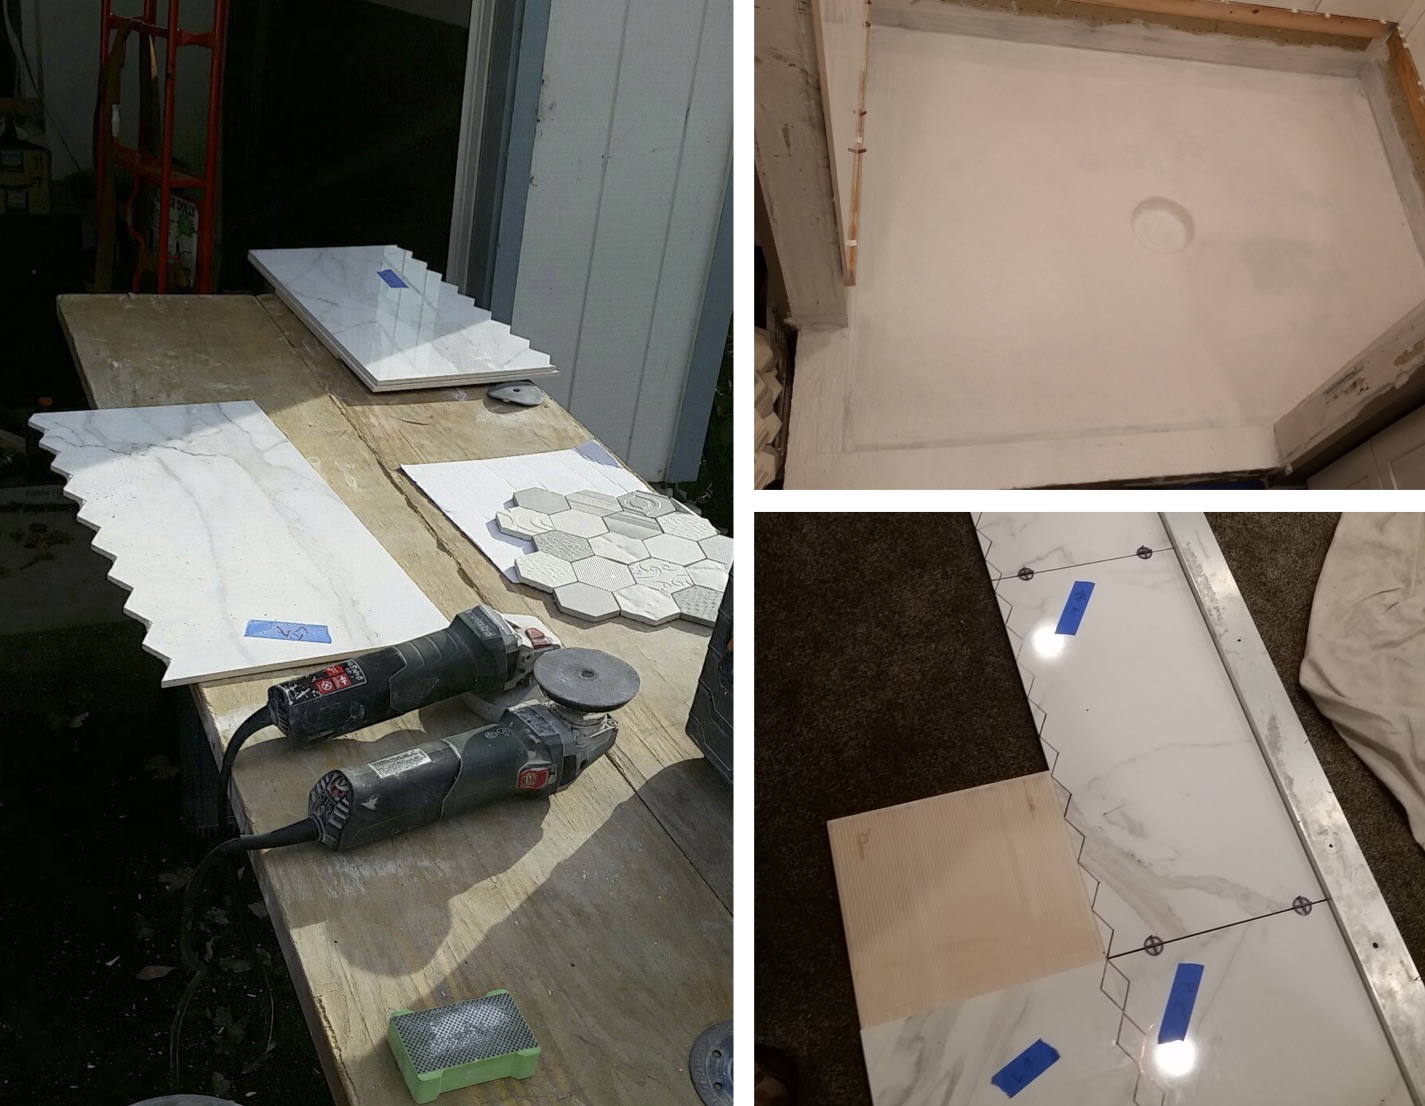
The tile is 14”x 28” ceramic from Love Ceramics. “Big tiles mean perfect prep,” he said. This included lightweight, extruded polystyrene core waterproof board walls that were wet-shimmed with high-performance, rapid-set, rapid-dry mortar with extended open time and build characteristics, which allowed the crew to run screws and sealant after lunch. The curb is built from 2” x 4” x 8” concrete block with the same mortar, and the top has a mortar screed so the topical waterproofing is pitched in.
The pan is a divot float of floor mud waterproofed with rapid waterproofing/crack-isolation liquid membrane and mesh reinforcement.
Tile is set in lightweight, non-sag mortar designed to accommodate large-and-heavy tile, and grouted using specialized cement grout, with silicone caulk at all changes of plane.
Davis noted that all straight cuts were made on a Montolit Masterpiuma 93p3, and edges broken with a diamond hand pad. The L-cuts around the niche and the miters on the curb were made on a wet saw.
Hex scribe layout is full tile at the ceiling. While marking it, Davis checked the distance between points to ensure the pattern wasn’t drifting. Cuts were done with a Metabo grinder and a respirator, edges eased on a variable speed.
“I cut the scribes in full tiles and then ripped them on the cutting board, and you’d better believe I held my breath while I made those scratch cuts,” he said.
Trims were fabricated on a 10” chop saw with a non-ferrous metal cutting blade. Erick Hendricks handled all the trim work, including the niches.“The shelves in the niche are what we’ve taken to calling the ‘miter sandwich’ – three mitered pieces fabbed from one piece of field tile so the grain wraps,” he said.
The right hand niche in the project is in an exterior wall, so Davis hung 2” polystyrene waterproof backer board walls on the sub-siding as a thermal break.
“The exterior wall precluded framing modification, so that niche’s placement dictated vertical layout,” Davis said. “Also, the tiles above and below the right niche are ripped so there would be no slivers or L-cuts. That focal niche was very important to the client, so we built the entire shower around it.”
The entire installation took Davis and Hendricks five and a half crew days.
“I love setting tile,” Davis said, “and I am truly blessed to have the opportunities tile is offering.”


