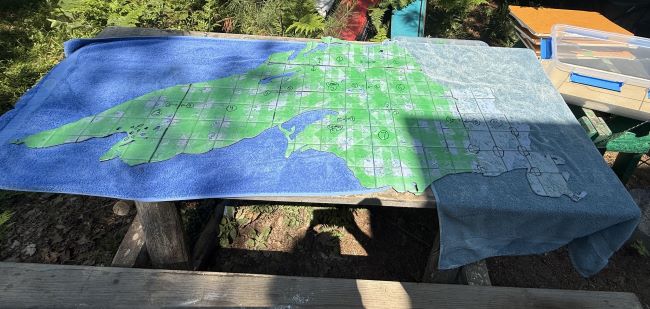
In my years as NTCA’s Training Department Director, Trainer and CTEF CTI Evaluator, I often said, “There ain’t nothin’ easy or simple about tile.” Now I also say, “Tile insets are no joke.” In this article, I am sharing my recent experience creating a mosaic inset.
Camp Driftwood
Camp Driftwood is my family’s property on the shore of Lake Superior in Michigan’s Upper Peninsula. We enjoy the Finnish sauna tradition and recently constructed one at our camp.
Like most saunas, ours consists of a hot room designed to manage intense steam vapor and lots of water usage. The wet area has a tiled floor and a properly waterproofed and sloped drain system designed to survive heavy usage in a demanding environment.
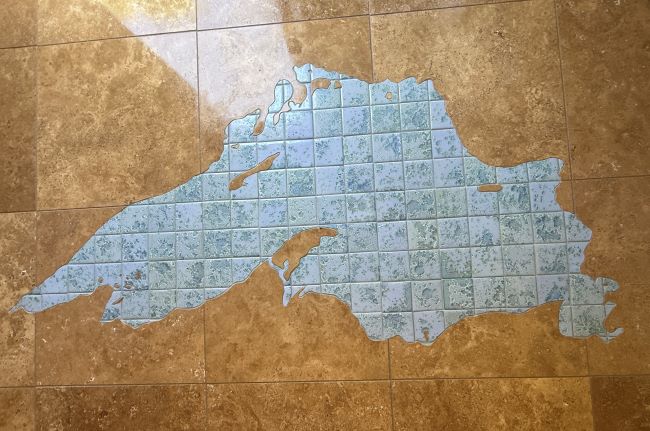
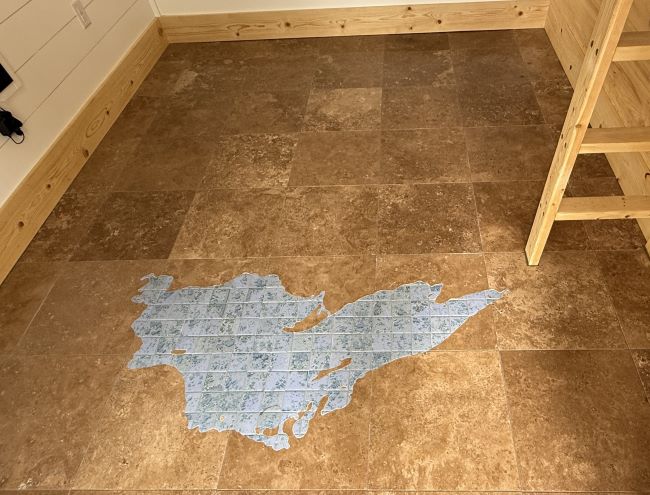
The adjoining dry area is a changing room with an electrically-heated tiled floor. It features 18” x 18” x 9/16”-thick builder-grade travertine for the field and a handmade mosaic inset cut from 3” x 3” x 3/16”-thick porcelain tiles. Considerations for installing this floor included:
- Disparity between mosaic and field tile thickness.
- Pre-mounting the mosaic.
- Support for small mosaic and small stone pieces over a heated floor in an uncoupling membrane.
- Substrate deflection and flatness.
- Extreme seasonal and operational temperature variations in the subfloor and tile layers.
- Final installation flatness and appearance.
In the shop
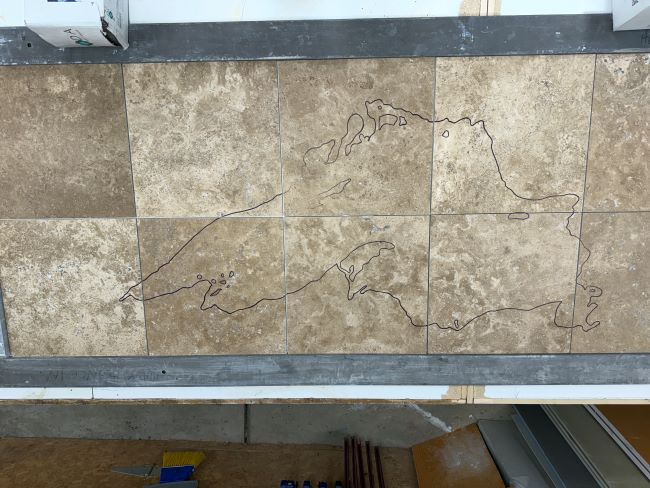
The project started in the shop, where I magnified a detailed digital image of Lake Superior to the desired dimensions of approximately 32” x 60”, then projected and traced the image onto heavy paper.
I cut the traced image using sharp X-Acto knives, preserving as much detail as possible. I selected and laid out the field tiles from which the inset was cut, which would serve as the shoreline of the design. I positioned the lake part of the template on the field tiles for best layout and traced the perimeter with permanent marker.
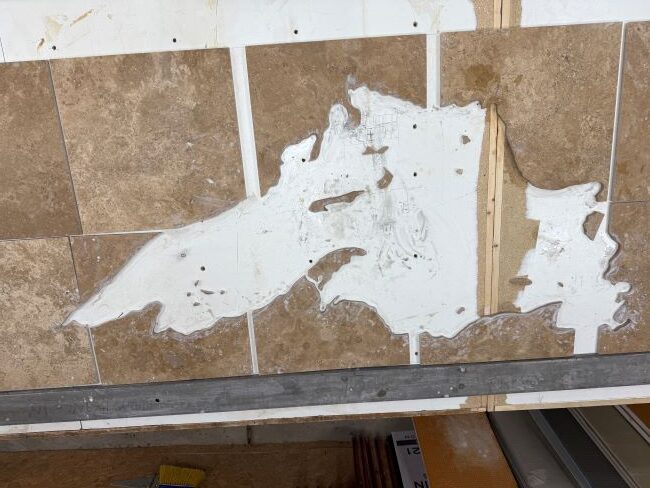
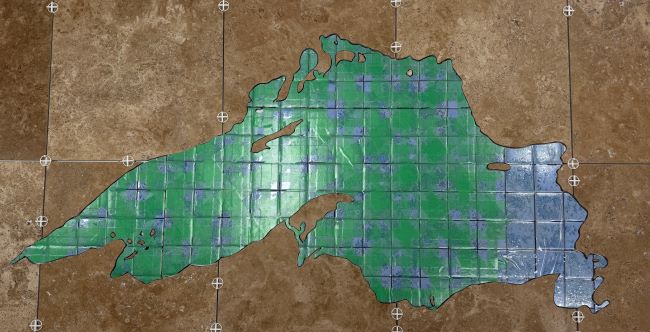
I used a Diamond Laser 7000 wet band saw to cut the travertine that formed the shoreline joint. I tuned the cuts using a variety of bit sizes mounted to my Inland grinders, and used sandpaper and files in the acute corners. I laid out the 3” x 3” porcelain mosaic tiles, then dry fit the field tile on top, adjusting for layout and marking the lake perimeter.
My wet band saw is too large for small mosaics, so I used my Inland DB100 wet band saw normally designed for glass. Taking my time, it worked well for the relatively thin 3/16” porcelain tile. I spiffed up the cuts using a variety of glass grinder bits, sandpaper and files, then removed any remaining mesh backing. When ready, I dry-fitted the mosaic lake inside the shoreline field.
Everything was going to plan, but things went downhill fast.
Before starting this project, I re-read the premounting section in the NTCA Reference Manual to decide which method to use. I chose face taping and pre-mounting to backerboard. Then I spoke with my mosaic mentors, Angie Ré, Lee Callewaert and Joshua Nordstrom, to learn what face tape they used, and ordered a roll of 12”-wide tape from EMI Specialty Papers and Tapes.
Face taping gone wrong
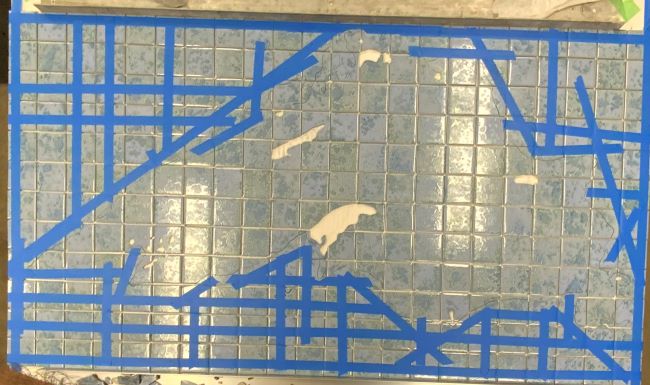
I made a big mistake by trying to apply the tape across the entire mosaic—by myself. It did not go well. I ended up with crooked, bunched-up tiles and a giant mess to recover from. It was a nightmare.
I was frustrated, so I walked away for a couple of days, then came back to unstick the tiles without breaking them. I removed the tape and relocated and realigned every mosaic piece. This time, I face taped using strips of Alpha G-Tape, then cut the mosaic into eight manageable sections that I dry-fitted into the lakeshore field. After many hours, it all fit together again.
I then laid the mosaic on top of 1/8” wedi board to pre-mount the mosaic, make up for tile height differences, and support small tiles over an uncoupling membrane. I traced the perimeter and cut the board using a jigsaw and thin-kerf, fine-toothed blades.
Finally, I numbered and packaged the mosaic sections and individual field tiles for transport to the project site.
On-site
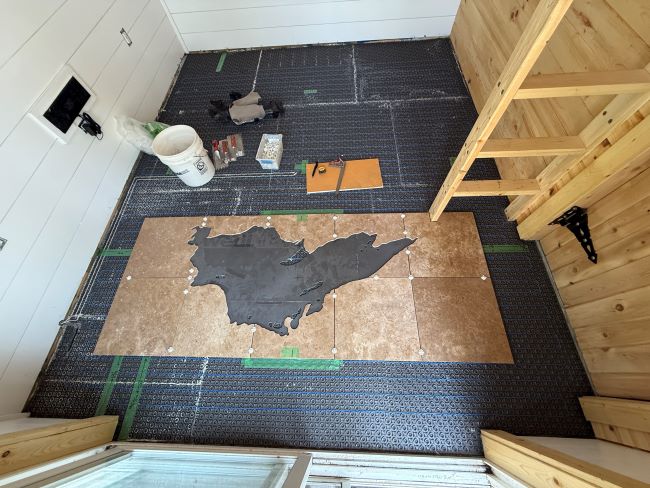
I constructed the substructure and substrate to conform to TCNA F-250 (Stone), using oriented strand board (OSB) rather than exterior glue plywood (EGP) as the substrate layer. Design deflection was greater than or at least L/720. The substrate was made flat by sanding high spots and patching low spots to less than 1/16” in 24” and 1/16” in 10’.
I installed Suntouch Heat Matrix uncoupling membrane, cable and probes, then set the travertine field, beginning with the pre-cut shoreline tiles, and allowed it to cure.
Don’t rush the process!
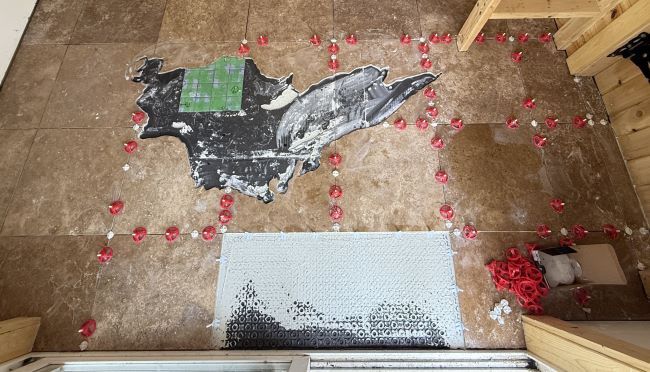
My next planned step was to pre-mount the mosaic sections to the 1/8” backer board and allow them to cure. I was running short on time and was concerned about a high relief of the mosaic against the field, so I decided to stray from the plan and tossed aside all of the best expert advice published in the NTCA Reference Manual. Instead, I chose to set the 1/8” backer into the field, then set the mosaic sections on it. You think I would have known better.
Gauge troweling bond coat to set the 1/8” board went fine.
Then, I screeded the bond coat for the face-taped sections of mosaics. I had a very difficult time gauging a consistent layer of bond coat onto the substrate bound by the intricate shoreline and ensuring 100% coverage for the small pieces. When I thought the bond coat was good, I set the mosaic sections, pressing and tapping them with a float and beat-in block while checking for flatness.
But there was lippage, crooked joints, and mortar oozing out everywhere. It was a total mess. I cut through much of the face tape to make adjustments and allowed it to cure overnight.
Next morning, I set to work pulling tape and cleaning mortar from grout joints. It took hours. I was disillusioned. Fortunately, I was my own client, but I am also my own worst critic. I was paying the price for rushing the process when I knew better.
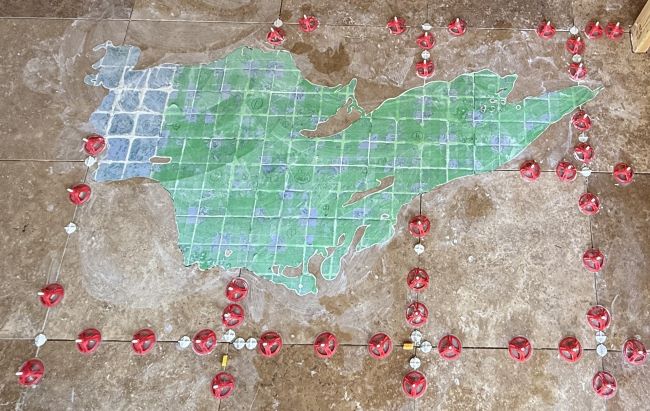
Ultimately, the installation cleaned up well. I grouted the mosaic with Bostik’s aquamarine blue urethane. I used an enhancing sealer on the stone and grouted the field to match the stone color.
Eventually, I completed all the other detail work in the room, and have learned not to stare at my mistakes in the mosaic.
Lessons re-learned
Next time I do an installation like this, I will:
- Stick to my plan.
- Allow more time.
- Don’t get caught in a rush when doing fine detail work.
- Follow the NTCA Reference Manual pre-mounting guidelines.
- Order and apply an adhesive template to the surface of the mosaic tile.
- Arrange for an assistant:
- During the application of adhesive template or sheet film on the mosaic.
- For the final installation of the mosaic inset into the field.
Tile is complex and can be very stressful. I am constantly challenging myself and learning—and I sure ain’t perfect. Tiling for me is like taking the CTEF Certified Tile Installer (CTI) exam over and over again. I sometimes drive myself crazy with all the challenges I create for myself, but it’s always worth the effort.
Knowledge, skill, ability, and experience are crucial factors determining the quality of performance. These are gained by putting yourself out there and trying. I encourage you to challenge yourself to a mosaic inset. If it doesn’t come out perfectly, learn from the experience, then try again. I am glad I did it; you will be, too.

Mark Heinlein
Mark Heinlein, CTI#1112, is the former Training Director for the National Tile Contractors Association (2015-2024) and a former Ceramic Tile Education Foundation evaluator for the Certified Tile Installer program. Heinlein owned Mark Heinlein Surfaces of Negaunee, Mich., prior to working with NTCA.