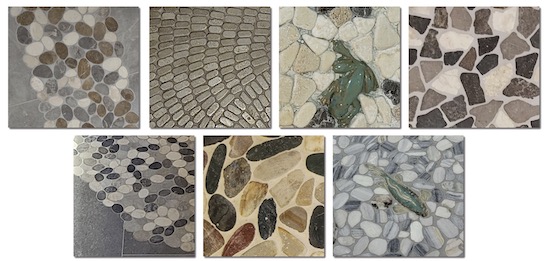
When it comes to pebbles, showers and bathrooms appear to be their natural habitat.
Seven ace tile setters shared their pebble projects with TileLetter for this feature, including their tips for pebble perfection.
Ken Ballin
CTI #1392, CFI #13604
Skyro Floors, West Creek, N.J.
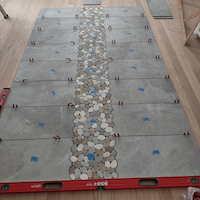

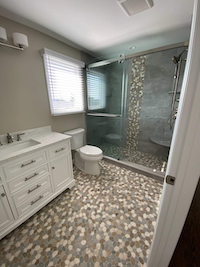
Ballin’s client wanted pebbles installed throughout the entire bathroom floor, shower pan, and down the back wall as a waterfall accent in two separate bathrooms. Ballin chose Blanke Permat uncoupling membrane and Island Stone pebbles, which don’t require extra measures to avoid sheet lines. Ballin templated the back wall and dry-laid field tile on the floor, laying pebbles on top and tracing them with his marker. He cut field tile – neatly and cleanly – in the client’s home with the Helix K Skribe blade on his grinder over a downdraft bucket hooked up to his iQ 426 HEPA vacuum.
Ballin chose Bostik Big Tile & Stone non-sag, large-and-heavy tile thin-set mortar, for the vertical surface, paired with high-performance Bostik Hydroment Vivid grout that Ballin loves for color consistency, enhanced stain and efflorescence protection in joints up to 1/2″.
To get his pebbles and field tile perfectly flush, he spread the area with a smaller-size trowel, allowed it to dry, spread more thinset to set the pebbles: and added a little more thinset to the back of each pebble along the scribe where needed.
His advice? “Make up a sample board and see what works best for you.”
Robb Olson
Footprint Wood & Stone
Minneapolis, Minn.
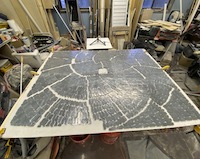

Olson experimented with a new “twist” on a pebble floor for the shower of his home he dubbed “The Swirl” – an “outward sweeping swirl that wraps upon itself,” he said. Olson laid pebbles out on a large workspace, covered them in two layers of carpet shield tape, then cut them into sections, creating face-mounted mosaic sheets that made transferring and installing easier.
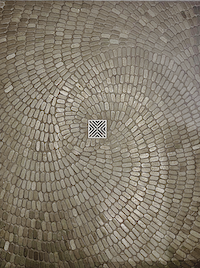

He wrangled with thickness variations among the pebbles, which were very well-adhered to the mesh backing. “I first covered the face of each mosaic with a strip of carpet shield to hold them together while I ran a diamond cup wheel over the backs to both get rid of the mesh as well as grind down the thicker ones to be the same as the rest of the tile,” he said. “Any pebbles that were thinner than the average would still have mesh/glue on the back and be easily identified and removed from the rest. The result was a much smoother finished floor.” Once installed, he buffed the pebble floor to give it a subtle reflective sheen.
Lyndsey Heist
A Pristine Touch LLC
Chagrin Falls, Ohio
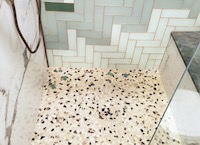

Heist and her husband customized a shower for a dear friend who loved the color green and frogs, and needed a shower space to accommodate her walker. Their friend had traveled with her husband to Sandals resort and wanted to replicated the feeling of the sand and pebbles between her feet.
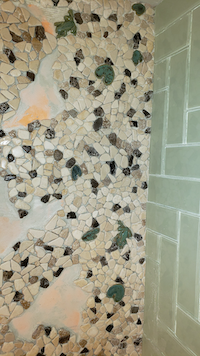

Heist reused the J’adore slab tub seat in the shower, and created a green ombre wall with glass tile from Floor & Decor, with large-format tile on the wall and seat from Hamilton Parker.
She learned from the Tile Geeks Facebook group to avoid sheet lines, so she laid the sheets out and sealed them, then removed sheets from most pebbles, except for the perimeter and around the drain, and filled in either one-by-one or in small groups of pebbles. Heist sourced handmade frogs and lily pad mosaics from Wet Dog Tile, to her friend’s delight. A Pristine Touch applied layers of sealer with 4″ foam roller and used Schluter KERDI board and pan with Schluter All-Set thinset mortar, MAPEI Flexcolor grout in Avalanche for the pebbles and large-format tile, and MAPEI Flexcolor 3D in Golden Rose for the green glass ombre.
This was a special project, which their friend enjoyed well until she passed a while later from cancer.

Matthew Quather
Q’s Installations LLC
Woodstown, N.J.
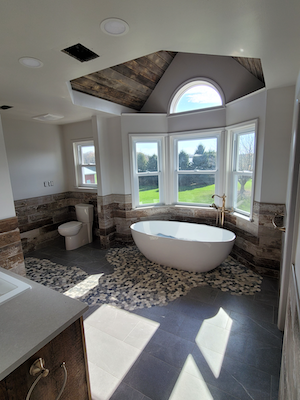
In this master bathroom install, Quather’s client gave him full creative freedom. He chose to create a scribed pebble walkway through the room into the tub area – using approximately 4,300 pebbles, all removed from the sheet and single set! “While challenging to match the pebble heights to the porcelain, I back filled the pebble field with some leveler in areas and it made it perfectly flush,” he said.
Chris Resti
Crest Tile and Mosaic, Inc.
Hilton, N.Y.
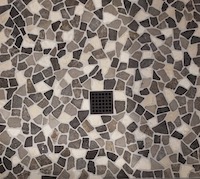

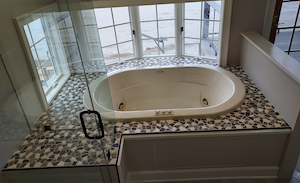

Tile artisan Chris Resti took pebbles from a big box store and turned them into a stunning bathroom installation. After removing them from the sheet, he sorted them by size and shade, keeping an even ratio of various colors and shapes during installation to conserve the pattern. He used a beating block or grout float to help stones sit flat. Resti chose LATICRETE setting materials, including epoxy grout for its durability and easier maintenance.
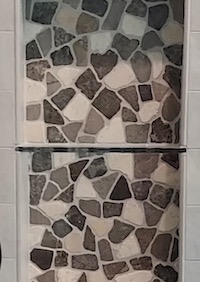

For a special touch – and with the client’s approval – Resti pre-mounted the niche with stones that looked like hearts for the center of each section of the niche.
Kyle Teeter
Supreme Tile & Flooring
Charlotte, N.C.
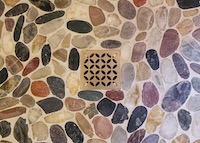

Teeter purchased the mesh-mounted pebbles at Best Tile, soaked the sheets and easily pulled them off the sheets after about an hour.
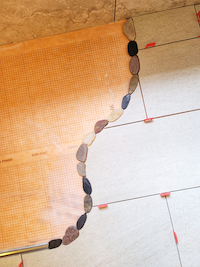

Teeter’s client wanted a curbless shower, with a unique twist. “When I presented them with the scribe option, they were sold,” he said.
Teeter purchased mesh-mounted pebbles at Best Tile, soaked the sheets and pulled them off after about an hour. New to scribe work, Teeter created a few test pieces to develop a comfort level with the process. To keep the pebbles flush with the 12″x24″ field tile, he layered KERDI membrane to build up the pebbles at the transition to the field tile.
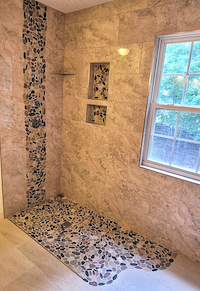

Teeter invited the homeowner to create the “bend” of pebbles at the entrance to the shower, letting her draw the line on construction paper, which Teeter used as a template for the field tile and single-set a row of pebbles along it. Teeter “traced each pebble onto the field tile, being careful to label and keep track of EVERYTHING. I then scribed the field tile and set it with [Schluter All-Set] mortar, followed by setting my ’bendy’ pebble line, and finally, single-setting the rest of the shower floor pebbles.”
Materials included a Schluter Shower System, MAPEI FA grout and coordinating Mapesil silicone and Ocean Side invisible sealer. The Rapid Recess kit made it easy to drop the subfloor for curbless entry. High-quality grinder blades, chamfer cones and polishing pads from Montolit helped Teeter keep his scribe edge clean.
Bill Vincent
Creative Ceramic & Marble
Harrison, Maine
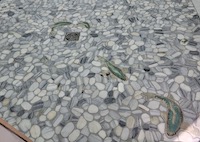

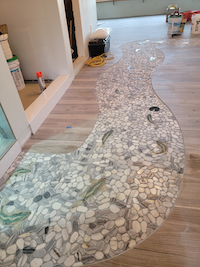

Bill Vincent, Creative Ceramic & Marble, transformed a lakeside building that had been a camp in Maine – and then was used as storage – into a health spa for the homeowner couple. The current work was inspired by a small meandering path of river rock in one of the guest bathrooms that Vincent did in the main house. The woman of the house asked for an inlaid “stream” in the porcelain plank floor, with inlaid fish and lily pads from the steam room to the small kitchenette. “Although I DID set a lot of sheets, especially around the fish themselves, most of this was set a stone at a time, so as to have as few cuts along the edges as humanly possible,” Vincent said. The project took about three weeks, and featured fish tiles sourced from Wayfair, river rock from Milford Flooring in Milford, NH, and LATICRETE Multimax thinset and LATICRETE Permacolor grout.
Editorial Director and Senior Writer for TileLetter and TileLetter ARTISAN
Lesley Goddin has been writing and journaling since her first diary at age 11. Her journey has taken her through a career in publishing and publicity, landing her the editor position of TileLetter and its special publications in 2006. Her goal is to educate, inspire, recognize and encourage those in the tile industry -- especially the tile and stone contractor.


