


In September, CUSTOM’s Will White penned a perspective into the horrors of spot bonding, a damaging and destructive practice that appears to be gaining ground. In this issue, CTEF’s Scott Carothers offers his emphatic take on spot bonding and what to do about it.
“Spot bonding” is the inappropriate placement of thin-set mortar on the back of a tile in mounds, one at each corner with one in the center, that some people believe will effectively install the tile while also eliminating tile-to-tile lippage. They are WRONG!!!
The problematic subject of “spot bonding” is so large and a tile industry failure-ridden practice that TileLetter magazine needed two separate articles, one by Will White of Custom Building Products and this one in an attempt to present the severity of this problem.

The installation of ceramic and porcelain tile has had a long history of established standards and methods used as guidance toward a successful and long-standing installation. When followed, the tile installation will function well, yielding a flat installation that is within the American National Standards Institute (ANSI) requirements for acceptable lippage. But when shortcuts or dubious tricks are utilized, the work will many times fail and be unacceptable, giving the tile industry another black eye.
This is the case with spot bonding of tile, which uses questionable practices to achieve a result where the tile is flat to the adjacent tile. In order to understand this trick, we need to determine how it done and understand its parameters.
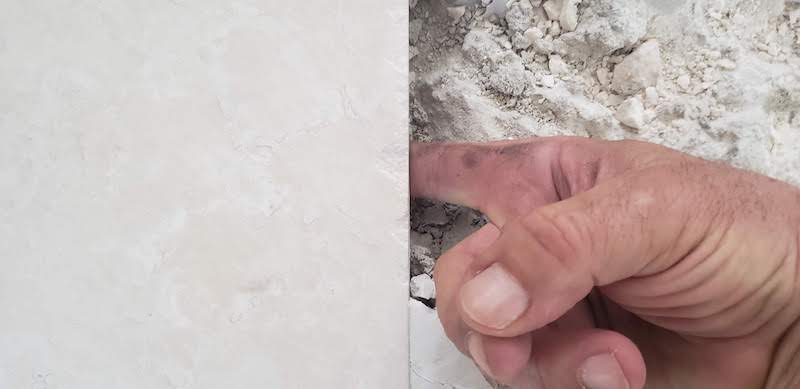
Five-spotting

Spot bonding occurs when loose dabs or mounds of thin-set mortar are (usually) placed on the back of the tile at each corner with one in the middle and is commonly known as “five spotting.” While this may provide a flat surface, the full support of the tile is far from the minimum mortar coverage of 80% in a dry area required by the ANSI standards. Additionally, the mortar is not keyed into the substrate with the flat side of the trowel to obtain a good mechanical grab nor are the trowel ridges collapsed, which leaves hollow channels.
The problem with this trick is that the ANSI requirements for mortar coverage that supports the tile and bonds it to the substrate are completely ignored. These minimum coverage requirements are found as follows:
ANSI A108.5-2.5 Setting quarry tile, paver tile, and other unmounted vitreous and impervious tile
2.5.1 Refer to mortar and latex manufacturer’s directions.
2.5.2 Press tile into freshly combed mortar, insuring mortar contact with tile. Maintain joint alignment and spacing. Keep an adequate joint depth opening for grouting.
2.5.3 Average contact area shall be not less than 80% except on exterior or shower installations where contact area shall be 95% when not less than three tiles or tile assemblies are removed for inspection. The 80% or 95% coverage shall be sufficiently distributed to give full support of the tile.
2.5.4 If 95% coverage is specified in the project specifications, back butter each tile with bond coat; or select a notched trowel sized to facilitate the proper coverage, key the mortar into the substrate with the flat side of the trowel, and comb with the notched side of the trowel in one direction. Embed the tile in the mortar by beating-in, pushing in a direction perpendicular to the combed ridges, or other means to achieve specified coverage. The method used should produce maximum coverage with the corners and edges fully supported. Periodically remove and check a tile to assure that proper coverage is being attained.

If the above ANSI standards were used by every person installing tile, spot bonding would not exist and we would not have the multitude of problems we see in the field today.
It is hard to determine how the spot-bonding practice got its start. Most likely, it was the necessity to get the tile installed really fast and still get it flat. If this was the case, the ill-trained individual was probably given a poorly-prepped or unprepped substrate that was not flat. In this tile placer’s mind (we can’t call these individuals tile installers due to their poor practices), the only way to accomplish the flatness goal was to build up the mortar beyond the manufacturer’s guidelines.
The key alternative here is to prep the substrate to meet the flatness requirement of 1/8″ in 10′ for large format tile, 15″ (38 mm) or longer. Properly-installed cementitious floor patch or self-leveling underlayment (SLU), with the appropriate primer, will provide an excellent substrate that meets the above flatness requirement. The other benefits are that these prep materials dry quickly, are cost effective, allow the tile to be installed more quickly, and are flat within the industry tolerances.
But it’s in the Handbook!!!!
But before some who read this article get all twisted out of shape and say, “But it is in the Handbook,” yes, in fact the Tile Council of North America (TCNA) Handbook does include two methods for spot bonding tile:
- Method W215 is for an installation over masonry or concrete
- Method W260 is for an installation over wood or metal studs and cement backer board.
Both of these methods state under the Recommended Uses category – interior walls where large format tile is specified with an Environmental Exposure Classification of R1 (Residential Dry) or C1 (Commercial Dry) installations. Under the Requirements section it states, “Epoxy must be recommended by the manufacturer for spot-bonding.”
In review, it is important to note that both of these recognized Handbook methods are designed for interior walls in dry areas only by using a specific type of epoxy bonding adhesive – never for floors. Apparently, a well-meaning installer concluded that if “I can do it on a wall, I can also do it on the floor.” Sorry, that is not true, and it was never designed as such, hence the reason that we are seeing so many failures.
Hollow sounding floors
Far too many tile installations that visually appear to be acceptable are rejected due to the hollow sound that occurs when walked on with a hard-heeled shoe. Some areas (those with adequate mortar coverage) sound solid and satisfactory, but a step or two away, the floor produces an unacceptable, cheap hollow sound that may be rejected. Unfortunately, the cheap sound is only part of the problem. The unsupported tile (voids between the spots) will crack due to the point load of refrigerator or another heavy appliance, a piano, a pallet jack, or a high heeled shoe. Case in point, an average-sized woman wearing a 4″ stiletto heel with a 1/4″ tap, will exert in excess of 2,000 pounds per square inch.
Beyond that, it must be pointed out that not all hollow or actually “different” sounding tones that may be heard when walking or tapping on a tile installation are due to spot bonding. The use of a membrane, which includes uncoupling, can yield a different tone, but this sound is a characteristic of many membranes and is not considered a defect. To solve this puzzle before it begins, always review the end result – in this case the sound – with the client before the installation begins. Tell them upfront what to expect to avoid any surprises.
Also, I would be remiss if I didn’t mention spot bonding’s first cousins – the Jersey mud job and the Miami sandwich, which also have a high rate of failure, but they are content for a future article.
Think about it: why use a trick that has a known high failure rate, over improperly prepped substrates, knowing in good conscience it will have to be replaced? Only use the spot-bonding trick if you can afford to do the job twice, with the second one coming solely out of your pocket. Think about it before it becomes a problem.
Educating consumers about Spot Bonding
This spurious installation practice is such a problem that the NTCA Consumer Education Committee decided to produce a three-page document directed to consumers about how to avoid and recognize a spot-bonded tile installation.
The document explains what some of the telltale signs are of spot bonding, what spot bonding actually is and why it is a problem, and what the results are. It also points out that tile is simply a surface covering and not a load-bearing surface, and needs to be supported by the proper application of bonding adhesive over a properly-prepared substrate in order to support the tile and avoid voids, cracks, hollow sounds and other problems. The piece also tells the consumer why spot bonding may be used and where to find setters that will properly install tile.
This document is available at Why Tile (https://bit.ly/whytile) and NTCA (https://bit.ly/ntca-consumers) and can be downloaded for use in-store or on jobs.
Together, we can wipe out the scourge of spot bonding.

Scott Carothers
Scott Carothers is the Acdemic Director for the Ceramic Tile Education Foundation (CTEF) and is responsible for the creation of the Certified Tile Installer (CTI) program, and is involved in the creation of the Advanced Certifications for Tile Installers (ACT) program as well as providing training to others in the tile industry.
Carothers has been involved in the ceramic tile industry for nearly 40 years and was the owner of a successful retail and installation firm prior to CTEF. He has served as President and Chairman of the Board of the National Tile Contractors Association (NTCA), Chairman of the NTCA Technical Committee, was named the NTCA Tile Person of the Year in 2005, and the NTCA Ring of Honor recipient in 2013. He is a voting member of the ANSI and the TCNA Handbook committees.


