


If you are an attendee of our NTCA online free webinars, this title may sound familiar. That’s because back in February, ARDEX Technical Manager Mark Pennine presented an NTCA Webinar on this subject. And since it so perfectly fits the planned topic for this month’s Technical section, we decided to excerpt parts of this talk to address the issue of substrate preparation. An initial talk on the subject was offered in September. Want to watch that webinar or review the material in this article? Visit the NTCA YouTube channel and peruse our archived presentations there: http://www.youtube.com/c/NationalTileContractorsAssociation. – Ed.
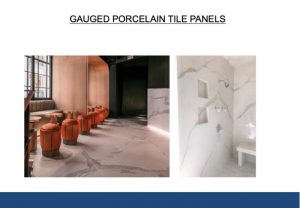
Proper substrate preparation has long been an essential aspect to a successful tile or stone installation. But today’s tile trends of large-format and gauged porcelain tiles and panels (GPTP) make flawless substrates even more critical.
Smaller tiles, like 6” x 6”, 8” x 8” or even 12” x 12” format, allow for conforming to inconsistencies in the substrates much easier. Massive GPTP products don’t offer room for variances in the substrate and need a flatter, smoother substrate. Tolerances for these products are tighter. For instance, substrate tolerance for tiles with all edges less than 15” in facial dimension is 1/4” in 10’ and 1/16” in 12”. But for large-format and gauged porcelain tiles and panels, the tolerance is inverse to the size – the larger the tile, the less the acceptable tolerance: 1/8” in 10’ and 1/16” in 24”is industry standard. Natural stone has always required more stringent surface flatness tolerances. Gauged porcelain panel recommendations are following those guidelines.
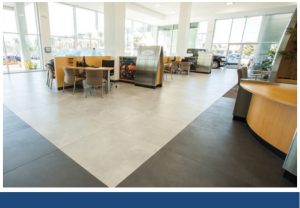
Installing large-format tiles is much more manageable and stress-free when self-leveling has been done ahead of time. Gauged porcelain panels installed on a properly-prepared substrate results in a beautiful clean installation, with a monolithic look.
Plan for performance
There is no room for shortcuts when preparing a substrate. When the job is well planned, substrates are prepared to industry guidelines and the installation is performed by qualified labor, the result is beautiful long-lasting installation.
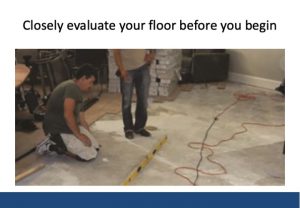
Closely evaluate floor before beginning installations and remember this phrase: “Prior proper planning prevents painfully poor production.” By following proper prep guidelines, you will maximize long-term performance while reducing installation costs. And you will minimize costly callbacks and enhance your reputation as a quality installer.
The five keys to a successful installation are:
- Attend training. Be educated.
- Substrate preparation – it’s always at the top of the list
- Using the right tools
- Use your resources
- Use Trowel & Error (bitly.com/trowelanderror)
Preparing the substrate: weak or soft top layers
ANSI A 108.01 general requirements mandate that substrates must be:
- Clean, structurally sound and solidly bonded
- Free of bond-breakers (sealers, curing agents and form release)
- Flat and smooth
- Free of excess movement
Soft or weak top layers pose problems in structural integrity and bonding and must be removed to achieve a strong, lasting bond. The most effective way to remove a weak top layer or contamination from concrete is by mechanical means. When mechanically preparing a substrate, be sure to use proper tools and protective equipment and prepare joints in wood subfloors prior to the installation of self-leveling materials.
Bond breakers
For concrete substrates, always mechanically remove:
- Release agents (tilt up construction)
- Paint
- Drywall mud
- Sweeping compounds
- Oil/grease
- Asphalt/tar
For wet or moist cured (burnished) concrete where no curing compounds have been used, and superficial contaminants have been removed, you can use the appropriate primer to prepare the substrate.
When you are dealing with sealing compounds on concrete, you must be able to determine what type of sealer was used and how to proceed before priming.
- Acrylic or epoxy compounds – remove superficial contaminants
- Urethane compounds – remove down to clean, absorbent concrete
- Acrylic non-dissipating curing compounds MUST be defined as “ACRYLIC”. There’s no mechanical prep necessary – just remove superficial contaminants and prime as necessary.

You can only remove adhesive residues on concrete. The adhesive must be scraped down to a well-bonded thin layer or residue. But if the adhesive is water soluble, it must be COMPLETELY mechanically removed before proceeding. Don’t use adhesive removers or solvents, since these will then become bond breakers. If your substrate is plywood, you can’t remove adhesive residue and then install on that plywood. You must remove the plywood with the residue and or apply a new layer of plywood over it before installation.
Sweeping compounds you may encounter at construction sites commonly use wax or are petroleum based. They can leave a bond-breaking residue on the concrete surface, and must be removed.
Tilt up wall construction utilizes parting/release agents to prevent concrete wall from sticking to concrete slab, and act as bond breakers. They must be mechanically removed before proceeding.
If there is material on the concrete that will affect the bond and you can’t identify it, err on the side of caution and mechanically remove it.
Primers
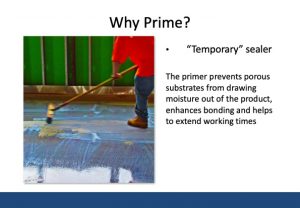
Priming is a critical step before self leveling since primers prevent porous substrates from drawing moisture out of the product, enhance bonding and extend working times of self leveling products. They are also bonding agents and will help setting materials bond to certain non-porous surfaces they would otherwise struggle to bond to on their own. Primers will usually be single-component acrylic or epoxy. Check with manufacturers for proper primer for your material, and the installation procedures.
Self-leveling underlayments
Don’t make the mistake of thinking that self leveling products are structural repair products – they’re not. They are surface repair products that prepare the substrate for the installation of finish flooring. But the substrate itself must be structurally sound. If structural repairs are needed, be sure to consult a engineer.
FLAT AND SMOOTH: In most cases, flat and smooth is what is required, but level is not always needed. If level IS required, be sure floor is plotted and leveling pins are installed, then pour sufficient material to achieve level.
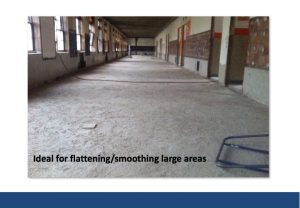
Self leveling is ideal for flattening and smoothing large areas. Some floors may require only 1/8” – 1/4” Others may require 1/2” up to 1-1/2”. Always use the proper product for the application.
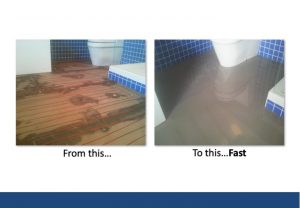
SLUs for tile and stone installations can help save time and money by speeding up installation and minimizing effort and repairs due to undulating and uneven surfaces. Most SLUs can be walked on as soon as three to four hours, allowing installers to start their layouts. Troweling can usually occur in six hours.
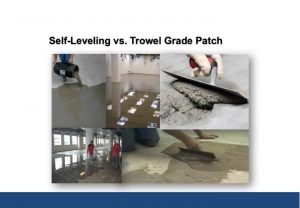
SLU OR TROWEL GRADE PATCH: Sometimes a trowel grade patch is all that’s needed. Other times, patching will take place before self leveling to fix cracks or spalls in the concrete.
Figure out if you need 1/8” or less to remedy the out-of-lane substrate. If it’s less than 1/8”, use a trowel grade on smaller jobs, and for larger jobs, use a high-flow SLU or patch. If your substrate is more than 1/8” out of grade, use a SLU. SLUs have exceptionally high flow and will heal even when installed at thin applications.
Do you need a slope? If the slope is greater than 2%, use a trowel grade material, and use a self-leveler if less than a 2% slope is needed.
Know your self leveler! They are not all the same. Some may be limited to certain types of substrates, or limited in thickness or take longer to dry. Use the product recommended for your application. Consult the technical person of the manufacturer of your choice. And since SLUs are very flowable, be sure to close off all openings before you begin pouring.

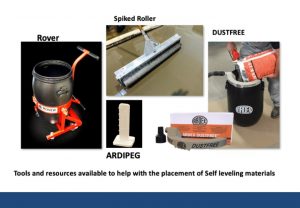
TOOLS: Some essential tools make self leveling easier and more efficient. Two popular tools designed to place and break the surface tension when using self levelers are:
- The spreader – the cleats on bottom allow for adjustments to determine how much material is applied to the floor.
- The spike roller breaks the surface tension.
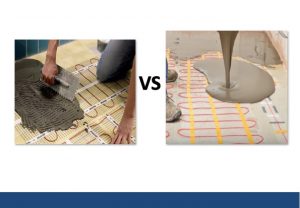
RADIANT HEATING: Self levelers are the best way to encapsulate floor heating wires. Once the SLU has cured, the installer can work on the floor without worrying about damaging the heating wires. And gypsum based SLU is ideal for use over in-floor hydronic heat tubing.
UNDULATED FLOORS – An undulated floor covered with cement board is still an undulated floor. A SLU offers a bondable surface and a flat and smooth finish.
Installing over existing tile installations
Installing over existing tile installation is becoming more popular since it eliminates costly tear-outs and health risks from the resulting dust. Be sure to investigate primers that are designed for non porous surfaces if you are tiling over tile, and make sure existing tile and stone – which will become your substrate – is well bonded. Another step you may need to take is to strip all wax and allow surface to dry thoroughly. Be sure to consult the manufacturer to determine suitable substrates and best product recommendations, and prime as necessary with a product designed for the porosity of your substrate.
SLUs have come a long way
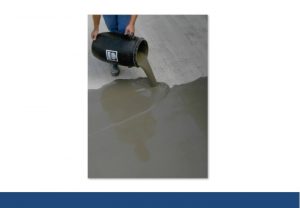
The first self leveler was introduced to the market in 1978. Today, there are a range of application devices and pumps that use up-to-date technology and provide easier workability.
For small jobs, you can use manual barrel mixing. It’s very important to measure water capacity and to use proper tools to be sure right amount of water is added every time.

Additional tools and resources help the job run smoothly, such as a cart for the mixing barrel, a spiked roller to break surface tension, dust control system and leveling pegs.
For larger jobs, new technologies range from portable small capacity pumps to medium capacity pumps that are modular or trailer mounted, and high capacity pumps perfect for urban applications. Evaluate your needs to choose the appropriate pump for your needs.
What could go wrong?
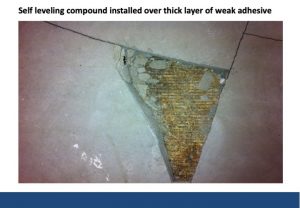
SLUs may seem miraculous – but they are not foolproof, and in some instances, they are just not an option. For instance, you’ll run into trouble with a self-leveling compound installed over thick layer of weak adhesive, since that will result in a cracked unbonded self leveler.
Overwatering leads to weak top layer and noticeable discoloration.
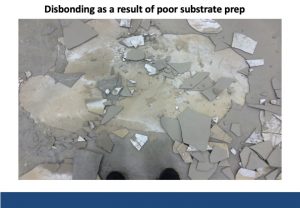
Disbonding can occur as a result of poor substrate prep and pouring over a contaminated substrate can lead to failures.
Final considerations
- Substrate prep is key to all tile and stone installation success
- There’s always a “right way” solution
- Stay in tune with industry trends and best practices
- Be aware of the inherent challenges
- Use your resources – industry guidelines, manufacturer technical services, supply partners, etc.

Mark Pennine
Mark Pennine has been involved in the tile and stone industry for over 35 years. As a third-generation tile installer, Mark owned his own tile contracting business for 25 years. Mark works for ARDEX Americas as the Technical Manager of Tile and Stone Installation Systems. He has presented tile and stone installation products and procedures to contractors, architects, manufacturers, and distributors. Mark is active on many industry committees including the ANSI ASC A108 standards committee, NTCA Technical committee, MMSA, and IICRC substrate committee.


