

When we analyze the results of the Certified Tile Installer (CTI) test, given by the Ceramic Tile Education Foundation, we can see that when individuals fail, it’s most commonly because they are unable to complete the test in the allotted time. Often, that’s because so much time was spent trying to determine layout, and those that struggled with their layout simply did not have time to complete their module.
In real-world situations, layout is essential for achieving a pleasing, even design. In either case, there is definitely a need for training on tile layout. The NTCA’s newest workshop program is designed around this theme, and these are a few of the topics we will be addressing in that new training.
ANSI and TCNA layout guidelines
Both ANSI and the TCNA give us guidelines for layout; this information can be found in ANSI A108.02 Section 4.3, and in the TCNA Handbook section “Field and Installation Requirements.”
ANSI directs us that:
- Tile layouts should be centered and balanced, if possible.
- We should not have an excessive number of cuts, with no cuts being smaller than a half tile when possible.
The TCNA Handbook suggests the same but gives us a variety of situations where these guidelines may not be the best option or even possible in some scenarios. Examples of these are:
- Considerations of focal points around decorative elements.
- When the size and configuration of the room and the size of the tile make it impossible to center the layout in all aspects.
- Layouts that are continuously flowing to several spaces.
- The effect the tile layout will have on waste.
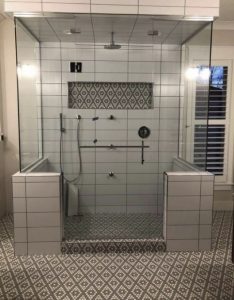
Minimum grout joint size
Another important section concerning layout in the TCNA Handbook addresses minimum grout joint width. The trend in our industry is for larger tiles to be installed with smaller grout joints. The guidelines in the TCNA Handbook can help installers to defend against customers who want smaller than acceptable grout joints or no grout joints at all.
A 1/16” grout joint is the smallest grout joint ever recommended. The minimum allowable grout joint size varies depending on the tile in use and how much one tile differs from another in size. The TCNA Handbook states, “To accommodate the range in facial dimensions of the tile supplied for a specific project, the actual grout joint size may, of necessity, vary from the grout joint size specified. The actual grout joint size shall be at least three times the actual variation of facial dimensions of the tile supplied.” Example: for tiles having a total variation of 1/16” in facial dimensions, a minimum of 3/16” grout joint shall be used.
In my experience as a tile contractor when using natural tile (which has a lot of variation}, the tile manufacturer will often recommend 1/4” grout joints or larger. Using this standard, many calibrated tiles I installed would require a 3/16” grout joint, and many rectified tiles would require an 1/8” grout joint.
Presenting this information as the industry standards and guidelines – and not as your personal opinion – can be beneficial in changing the owner’s perspective.
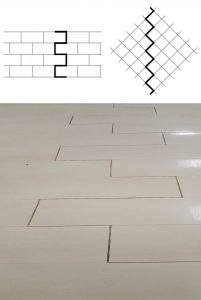
Running bond, brick joint, or any offset pattern
Considering the location of the offset joints in a brick pattern is an important part of layout and is also addressed in our standards. The TCNA Handbook states, “For running bond/brick joint and any offset patterns utilizing tiles where the side being offset is greater than 15”, the offset pattern will be a maximum of 33% unless otherwise specified by the tile manufacturer. If an offset greater than 33% is specified, specifier and owner must approve mock-up and lippage.”
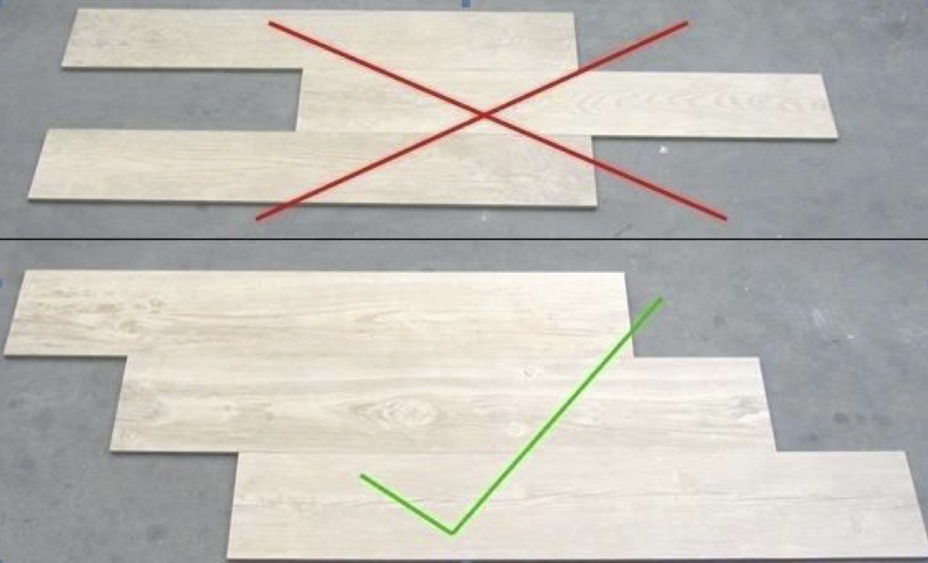
The reason this offset is important is because larger tiles may have more warpage up to a cap designated in ANSI A137.1. When installing these tiles on an offset joint at 50%, we now have the high point of one tile (the middle) next to the low point (the ends) of the two adjacent tiles, which can give us unacceptable amounts of lippage.
System modularity
When laying out certain patterns, it is necessary to use tiles that are modular in nature. Modularity is defined per ANSI A137.1 as “Tiles of various nominal dimensions are sized so that they may be installed together in patterns with a common specified grout joint width.” Verifying system modularity and specifying the allowable grout joint for the pattern of an actual tile to be installed are the responsibility of the design professional. If the tiles are not modular or made for the pattern you will install, there may not be room to account for the grout joint.
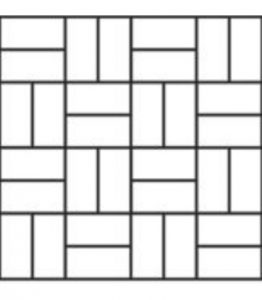
An example of this is a basketweave pattern. If the tiles to be used were 4” x 8” exactly they would not account for the required grout joint. If the two short sides were exactly 4” and met the long side which is exactly 8”, they would butt tightly to each other. However, if the dimensions of the tile were 3-7/8” x 8” this would allow for a 1/4” grout joint and therefore be modular. That is a very simple example but this same principle would also apply to many patterns that include multiple sizes of tile.
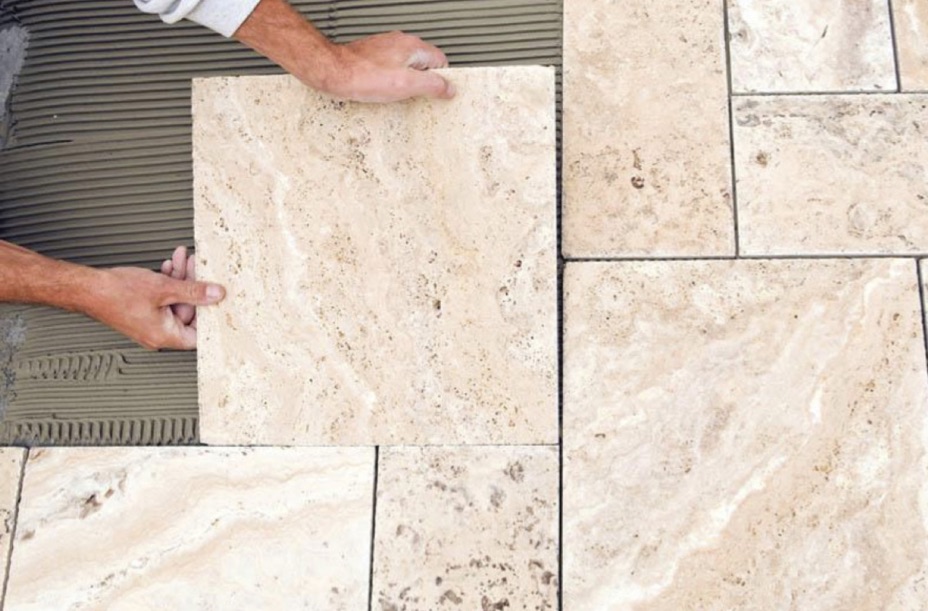
Grid lines
Using a grid system is not the only way to do great layouts, but is a tremendous tool.
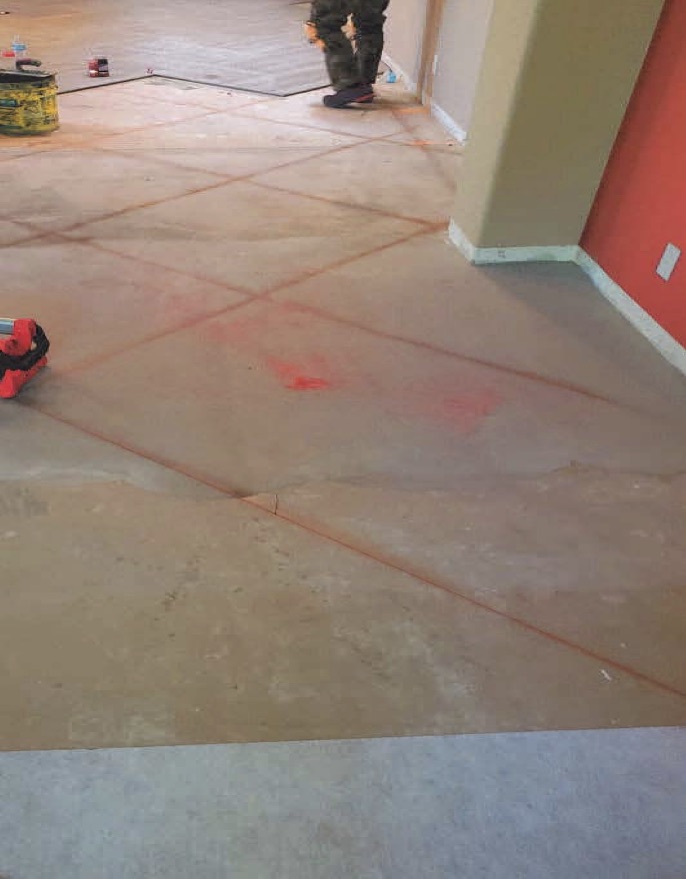
One skill set that it seems most every professional tile installer possessed in the past is the ability to lay out an entire floor using grid lines. With this method of layout, the entire area to receive tile is gridded out with chalk lines to show where every tile will be placed before the installation starts. The attached picture shows installation going in this way.
The advantage of this system vs. getting reference lines and using spacers is three-fold.
- You can quickly calculate the exact size of every cut in the installation before you start and can communicate that information to the owner or responsible party before you begin work.
- You can have multiple installers in different areas of a project all working simultaneously, and they will be able to tie into each other’s work.
- When tiling continuously around obstacles like an island or carpet inset, you can connect your work more easily.
Movement accommodation joints
One of the leading reasons for tile installation failures is lack of movement accommodation joints. The response installers often give for not installing movement accommodation joints is that these joints create an aesthetic issue that their customer would never accept. There have been changes in ANSI A108.01 that now allow for nonlinear movement accommodation joints, which would not disrupt the flow of a pattern in a layout. Crack-isolation membranes can also be used in accordance to TCNA Handbook method F125. This allows the soft joints to be moved to the adjacent grout joints without disruption to the layout or tile pattern. With proper planning in coordination with the owner and design professional, a layout that looks great and has the appropriate movement accommodation joints is more possible than ever before.
We will discuss this information and much more in our upcoming NTCA Workshops. At our in-person events, we will have a variety of stations for hands-on layout training. In addition, keep an eye out for notices about our local NTCA Virtual Workshops, sponsored by a host in your area. These virtual workshops will be set for the dates of the original physical workshops that had to be temporarily put on hiatus. These will be given in webinar format, and will offer opportunities to type in questions about the material being presented.
Stay safe, and I will look forward to seeing you on the road soon.

Robb Roderick
Robb Roderick has been in the tile industry for nearly 25 years. He has worked with homeowners, builders, architects, and interior design professionals on projects in both residential and commercial settings. Prior to coming onboard with NTCA, Roderick was a member of the association for several years and is a CTEF Certified Tile Installer. He graduated from Missouri State university in 2000 and has also served in the United States Army as a medic. Roderick tours the country bringing NTCA Workshops and CTEF Educational Programs to local audiences nationwide.


